
Printix Cloud Print Management Service is a cloud-based multi-tenant subscription service, which runs with Printix Client installed on users’ computers (Windows and Mac) and with a copy of the print infrastructure. No on-premise servers and databases are required.
- Step 1: Create a new Printix Home
- Step 2: Install Printix Client on the first print server
- Step 3: Install Printix Client on print server at remote site
- Step 4: Add sites without print server
- Step 5: Deploy to computers
- Step 6: Remove print servers
Prerequisites:
- You have access to an administrative account.
- You can sign in to the print servers on the network.
- If the print server’s Windows Server OS is old and has not been updated for a while, an out-of-hours Windows update should be scheduled, so a supported web browser (Microsoft Edge) is installed, as this is required for Printix to work.
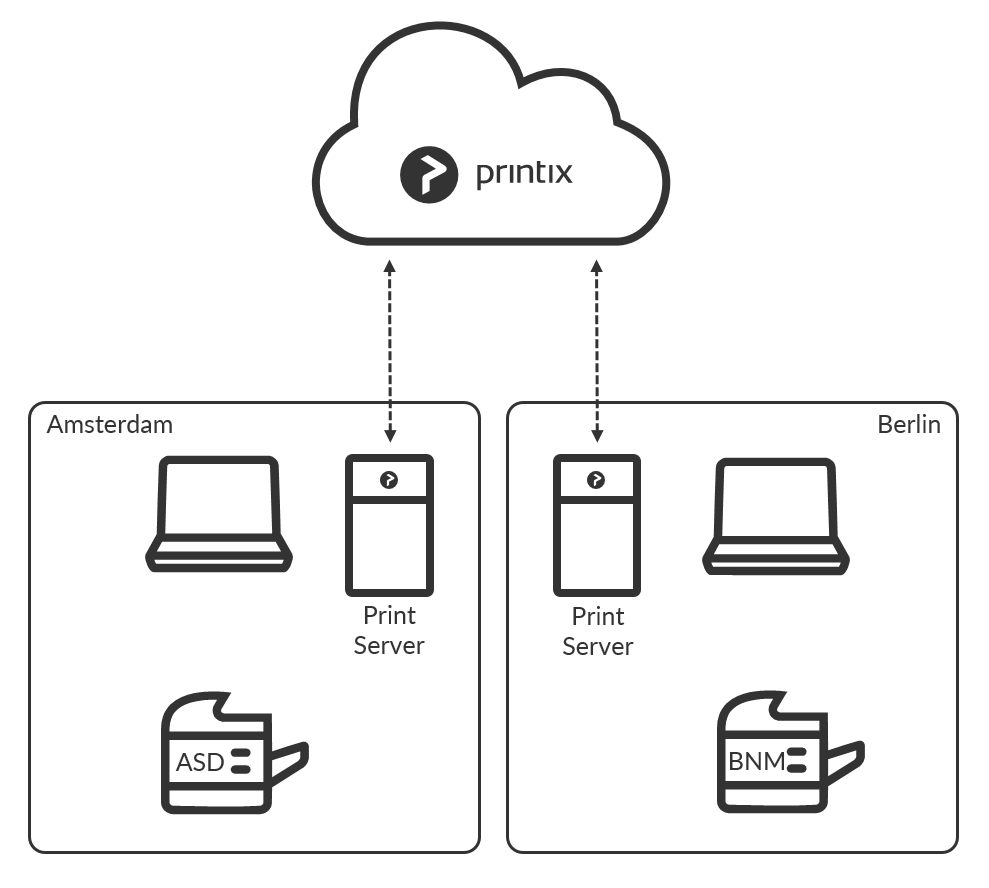
Step 1: Create a new Printix Home

Action
Step 2: Install Printix Client on the first print server

Action
- Install Printix Client on the print server.
- The Microsoft Edge web browser Security settings may obstruct the download of the Printix Client software. To workaround this you may want to download it on another computer (without installing) and then copy it to the print server, so you can run it from there.
- If you have issues with Sign in to Printix Client, then please read: Sign in issues.
What happens
- Printers are discovered and registered in the Printix Cloud.
- Print queues are discovered and registered in the Printix Cloud.
- Print drivers are registered for each print queue on the print server.
- Signed and unique print drivers are uploaded to your Printix driver store.
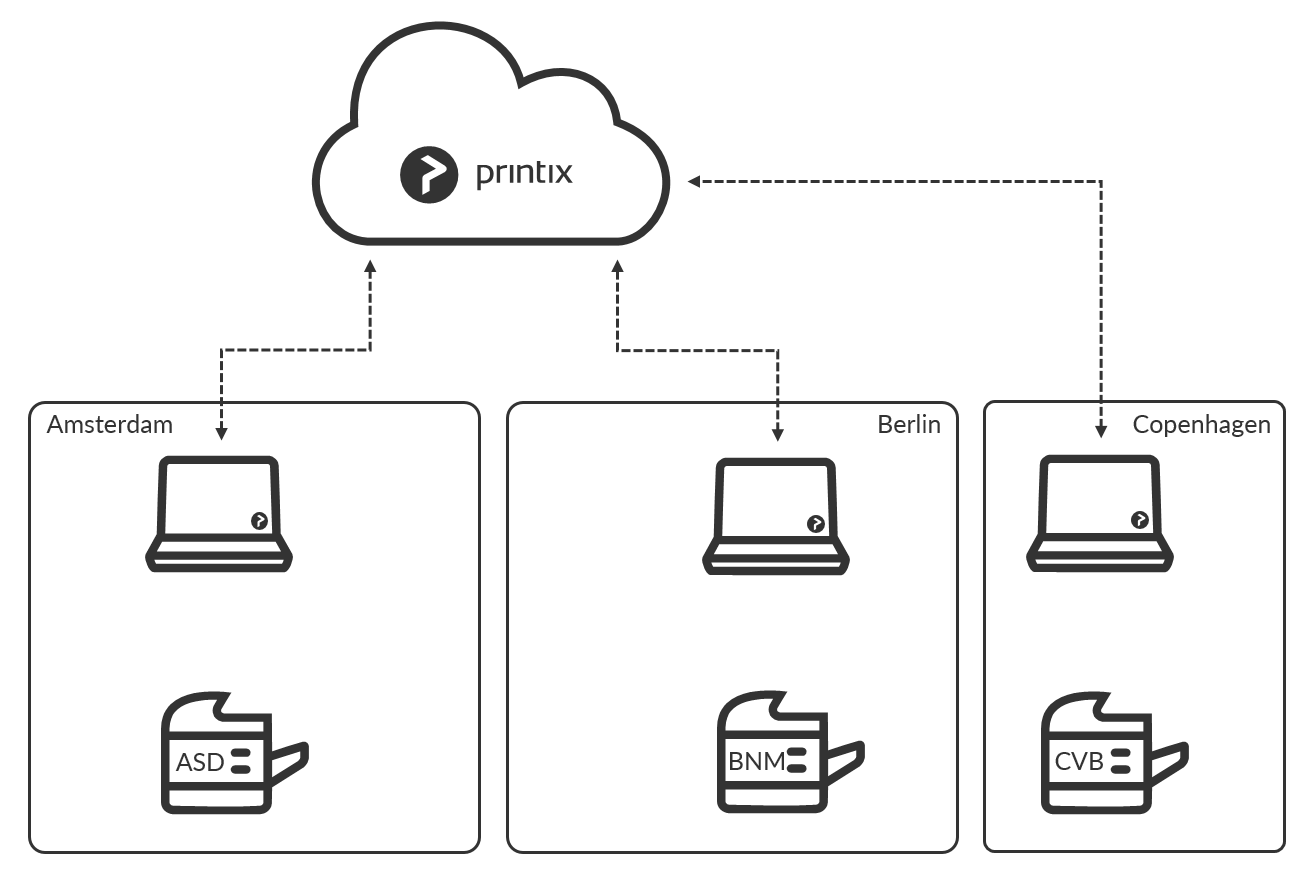
- Printers get a three-letter printer ID (ASD, BNM, …).
- Printers that are not online at this time can be added later.
- Network1 is created with the gateway of the print server’s network adapter.
- If printers were found via for example two network adapters (LAN and Wi-Fi), then an additional Network2 is created with the gateway of the other network adapter. If the networks are logically the same, that is computers on Network1 can connect to computers on Network2, and vice versa, then you should merge the networks.
Action
- Optionally Modify the network name Network1 to a descriptive name (Amsterdam).
- If there are additional print servers on this site, then install on these also, to make the copy of the print infrastructure as complete as possible.
Open the Computer properties page of the print server and select Discover printers.
See also:
Step 3: Install Printix Client on print server at remote site
Action
- Install Printix Client on the print server.
- Open the Computer properties page of the print server and select Discover printers.
What happens
- Printers are discovered and registered in the Printix Cloud.
- Print queues are discovered and registered in the Printix Cloud.
- Print drivers are registered for each print queue on the print server.
- Signed and unique print drivers are uploaded to your Printix driver store.
- If printers were found via for example two network adapters (LAN and Wi-Fi), then an additional NetworkN+1 is created with the gateway of the other network adapter.
Action
- Optionally Modify the network name to a descriptive name (Berlin).
- If there are additional print servers on this site, then install on these also, to make the copy of the print infrastructure as complete as possible.
Open the Computer properties page of the print server and select Discover printers.
Step 4: Add sites without print server
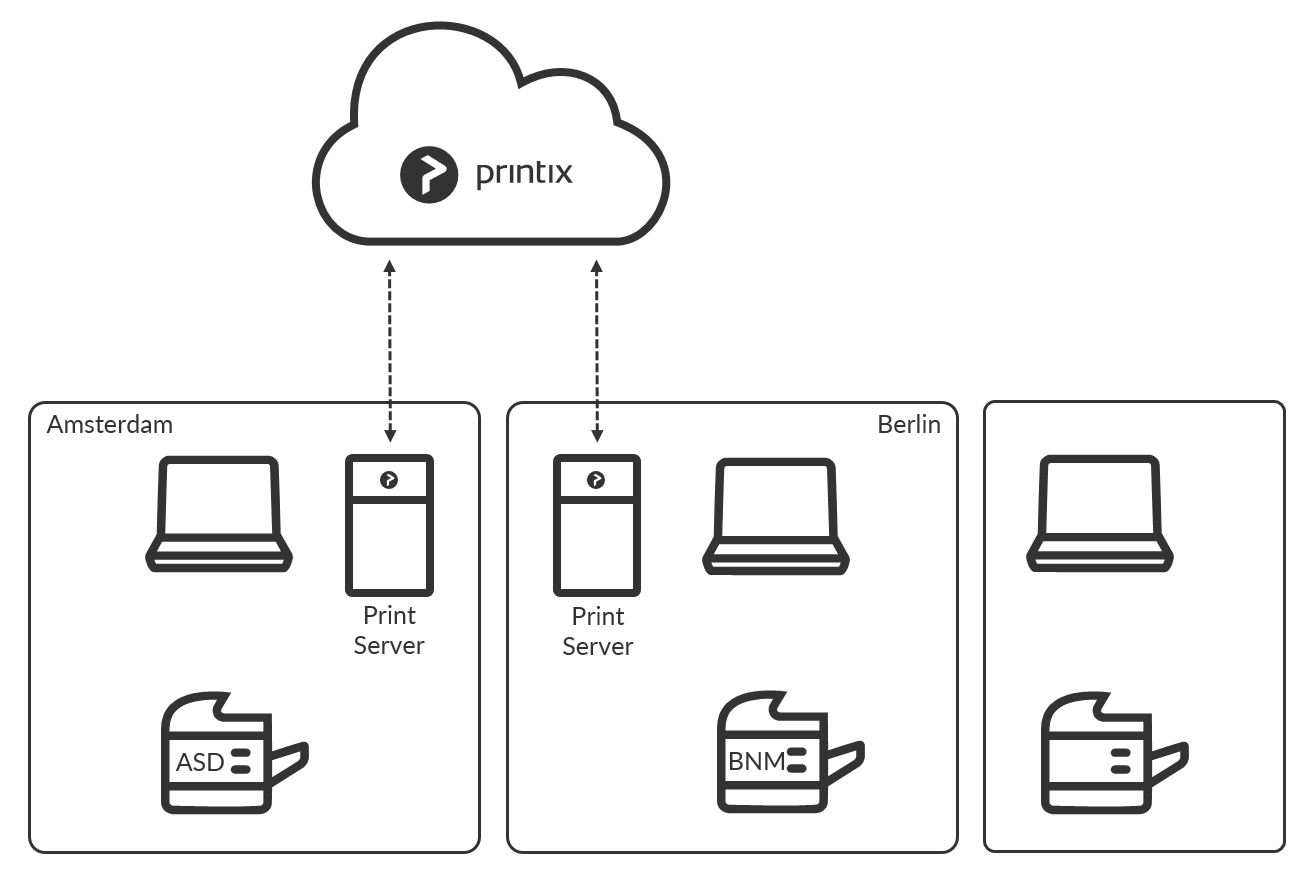
Action
- Install Printix Client on a computer at the site you want to add.
- If you can remotely sign in to the computer as administrator, then you can also install Printix Client. Sign in to Printix Client.
- Alternatively use Add user to invite a user at the site you want to add. If possible call and notify the user in advance. Wait for this user to install and sign in to Printix Client. You can also use your own email account to send an explanatory message that includes a link to the Printix Client download page. Example: acme.printix.net/download
What happens
- The user’s computer appears on the Computers page as being on an Unknown network.
- If the computer has for example two active network adapters (LAN and Wi-Fi), you will see Unknown Unknown, one for each network adapter.
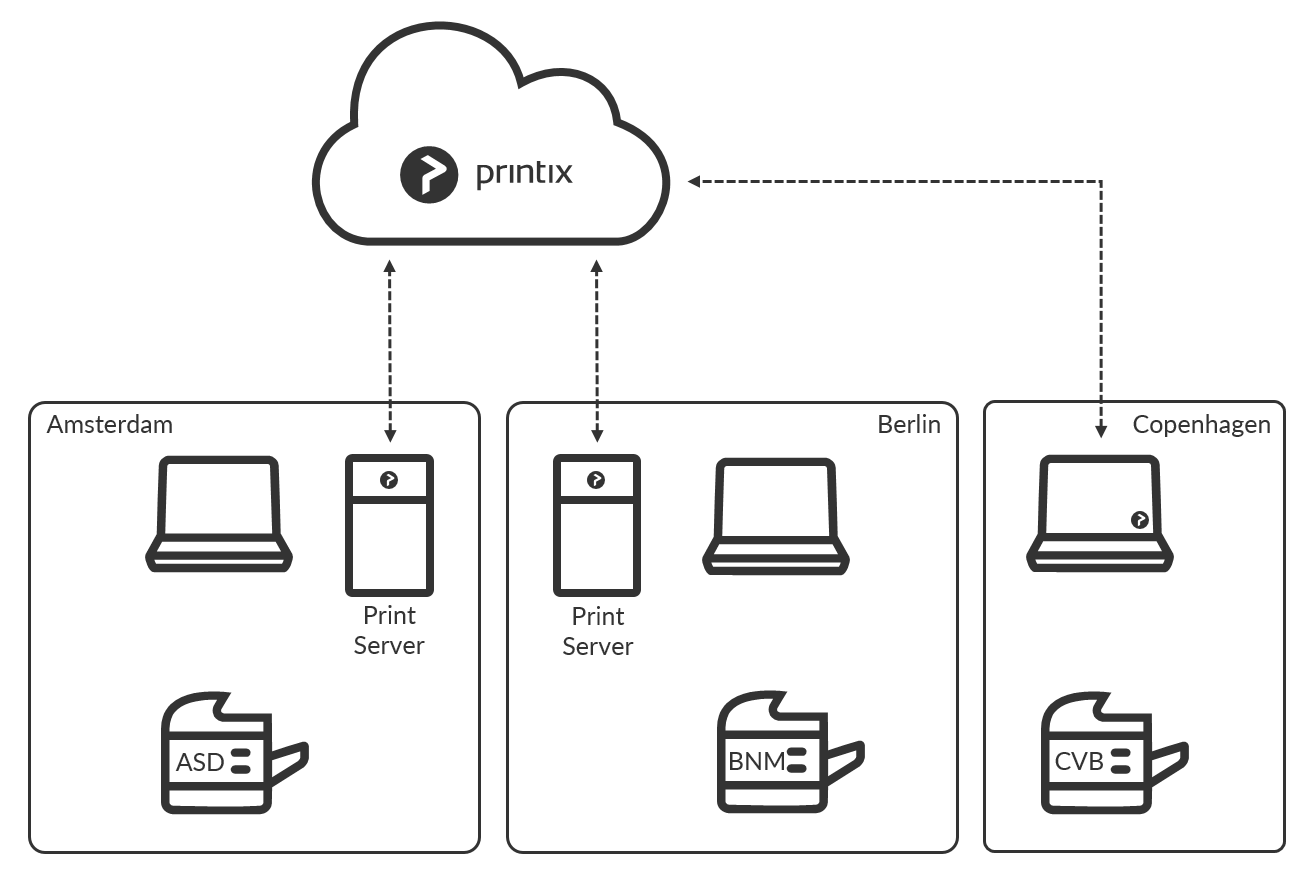
Action
- Use Add network and give the network a descriptive name (Copenhagen).
- Use Add to network to add the gateway (LAN and/or Wi-Fi) of the computer to the network.
- Use Discover printers and select the newly added network (Copenhagen).
What happens
- The user’s computer appears on the Computers page as being on the network: Copenhagen.
- Printers are discovered and registered in the Printix Cloud.
- Print queues are discovered and registered in the Printix Cloud.
- Print drivers are registered for each print queue on the print server.
- Signed and unique print drivers are uploaded to your Printix driver store.
- Each print queue on the computer that points to a registered printer is converted.
Action
- If there are additional sites, then install on these also, to make the copy of the print infrastructure.
Step 5: Deploy to computers
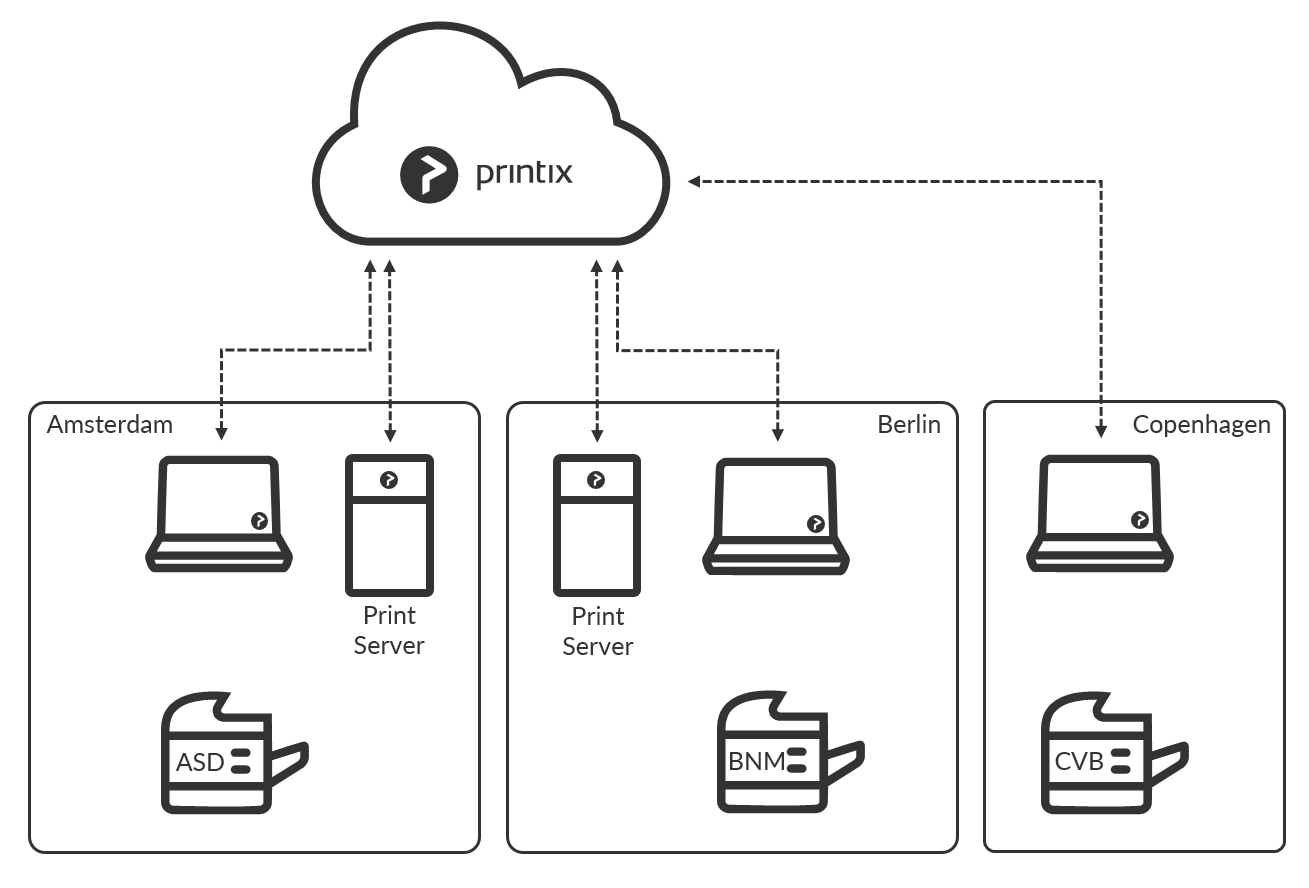
Action
- If not all of your printers are listed on the Printers page, then add the missing printers.
- Optionally rename printers and print queues.
- Use your preferred method to deploy Printix Client, such as Microsoft Endpoint Manager, and get users to print with and use Printix.
- If users Sign in with Microsoft you may want to Accept Printix for all users.
Step 6: Remove print servers
Action
- Verify that the print servers’ shared print queues can be paused without users complaining.
- Verify the server does not have additional roles, such as Domain Controller, File Server, etc.
- Decommission the print servers.
Impact
- Removes print server.
- No single point of failure.
- Centralized print queue management.
- Save on infrastructure and support costs.
- Eliminate WAN traffic related to print jobs.
- Track user and usage statistics.
- Track printer statistics.
- Flexible and secure printing (Print anywhere and Print later).
- Unlimited scaling at no extra cost.
- Printix software automatically update itself to the latest approved version.
Post your comment on this topic.