
Install a TCP/IP print queue that uses the print driver you want to add to Printix. After adding the print queue Printix Client will automatically upload the new print driver to your Printix driver store, as soon as the Printix Service is restarted either manually or by restarting the computer.
- On your Windows computer either insert the print driver CD or download the print driver from the printer vendor’s web site.
- Install the printer using the CD and/or:
- Optionally use Print test page to verify that the print driver works and is compatible with the printer.
- Stop and start the Printix Service. If a new print driver is found it will be uploaded to your driver store.
- It may take up to 10 minutes before the uploaded print driver is available on the Print drivers page.
- You should repeat the above steps for the additional Windows and/or Mac editions used in your organization.
- If there is no dedicated print driver for a particular printer, then an appropriate Universal print driver may be used.
Add a printer on Windows
- Open Devices and Printers in Windows.
- Select Add a printer.
- Select The printer that I want isn’t listed.
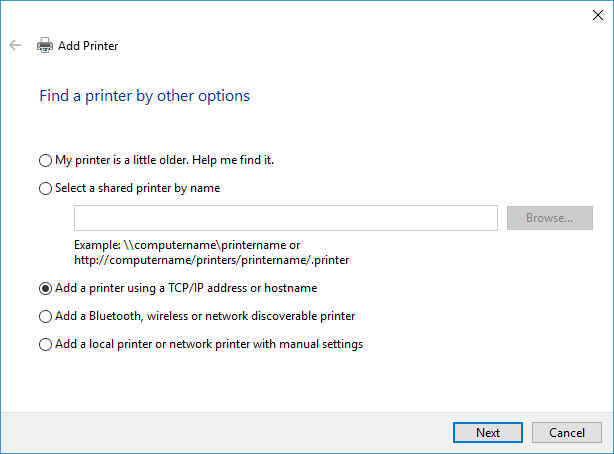
- Select Add a printer using a TCP/IP address or hostname. Select Next.
- As Device type select TCP/IP Device.
- Uncheck Query the printer and automatically select the driver to use.
- Enter Hostname or IP address of the printer.
The print driver will still be uploaded if you enter an address that does not point to the printer, but you will not be able print a test page to verify the print driver works with the printer. - Select Next.
- Select Have Disk…
- Browse to the folder where you installed/unpacked the print driver and browse through the folders until you locate an .inf file.
- Select Open.
- Select OK.
- Select the printer. Select Next.
- If asked, select Replace the current driver. Select Next.
- Select Next to start the installation of the printer.
- Select Do not share this printer. Select Next.
- Select Finish.
- Stop and start the Printix Service.
Add a printer on Mac
- Select Apple menu
![]() , System Settings…, then select Printers & Scanners.
, System Settings…, then select Printers & Scanners. - Select select Add Printer, Scanner or Fax…
- Select the IP (globe icon) tab .
- In Address enter the IP address of the printer.
The print driver will still be uploaded if you enter an address that does not point to the printer, but you will not be able print a test page to verify the print driver works with the printer.
- In Protocol select Internet Printing Protocol – IPP.
- In Use select Select Software to open the Printer Software dialog.
- Select the print driver and select OK.
- Select Add to add the printer with the selected print driver.
- Stop and start the Printix Service.
On macOS 12 or earlier:
- Select Apple menu
![]() , System Preferences…, then select Printers & Scanners.
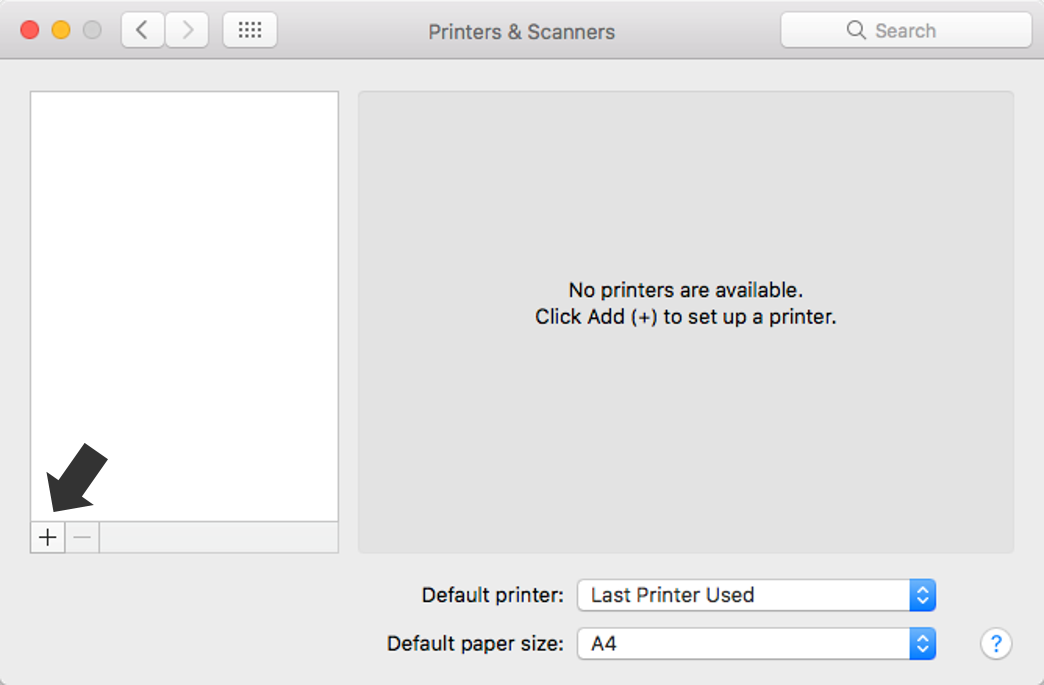
, System Preferences…, then select Printers & Scanners. - Select Add (+) and select Add Printer or Scanner…
- Select the IP tab.
- In Address enter the IP address of the printer.
The print driver will still be uploaded if you enter an address that does not point to the printer, but you will not be able print a test page to verify the print driver works with the printer.
- In Protocol select Internet Printing Protocol – IPP.
- In Use select Select Software to open the Printer Software dialog.
- Select the print driver and select OK.
- Select Add to add the printer with the selected print driver.
- Stop and start the Printix Service.
Post your comment on this topic.