
If a printer is using an EFI Fiery Controller, also known as a Raster Image Processor (RIP), you should follow these instructions to get the printer added in Printix Administrator.
Before you begin, please obtain the following information:
- IP address of the Fiery Controller
Printix may not recognize it as a printer, so it will not appear after a Discover printers.
Add the EFI Fiery printer
- Open a web browser and enter the IP address of the Fiery Controller and sign in.
- Select the Configure tab.
- Select Network and then SNMP.
- If required, add a SNMP configuration in Printix Administrator that corresponds to the Fiery Controller’s SNMP settings.
- In Printix Administrator open the Printers
![]() page.
page. - Select Add printer
![]()
- In Network select the Modify
![]() icon to select the network where the Fiery Controller is. Select Select network.
icon to select the network where the Fiery Controller is. Select Select network. - In SNMP configuration optionally select the Modify
![]() icon to select the SNMP configuration you perhaps added in step 3. Select Select SNMP configuration.
icon to select the SNMP configuration you perhaps added in step 3. Select Select SNMP configuration. - In Printer address enter the IP address (Example: 192.168.1.10) or hostname of the Fiery Controller.
- Select Add.
Configure the print queue
Configure the print queue for the Fiery Controller so it:
- Uses the print driver for the printer with the Fiery Controller.
- If required Add the print driver to your Printix driver store.
- The Model name of the registered printer may indicate a Fiery Controller is in use.
Example: Xerox Color C70 with Xerox EXC70 Fiery Integrated Controller.
In Printix Administrator proceed to Add a print driver configuration. The temporary printer’s Printer properties dialog will open automatically.
Proceed to make the configuration:
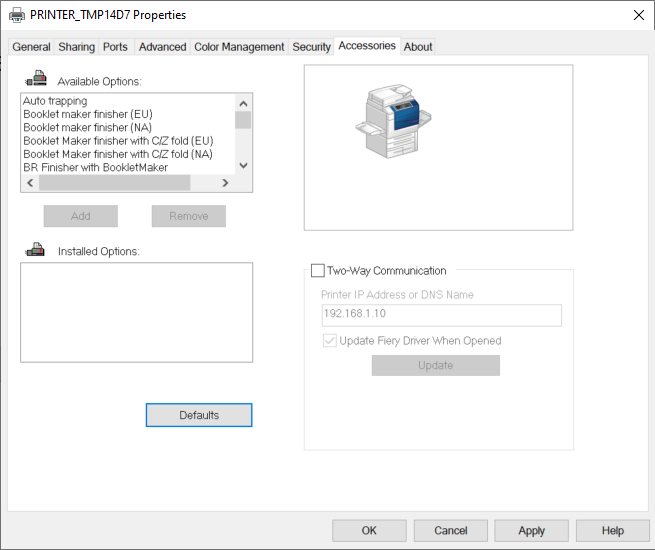
- In the Printer properties dialog select the Accessories tab.
- Check Two-Way Communication and in Print IP Address or DNS Name enter the IP address (Example: 192.168.1.10) of the Fiery Controller.
- Select Update.
- After all Installed Options are registered correctly, uncheck Two-Way Communication, as this is not supported when the printer is managed by Printix.
- Select Apply.
- Optionally open the Advanced tab and select the Printing Defaults… button to configure per-printer defaults.
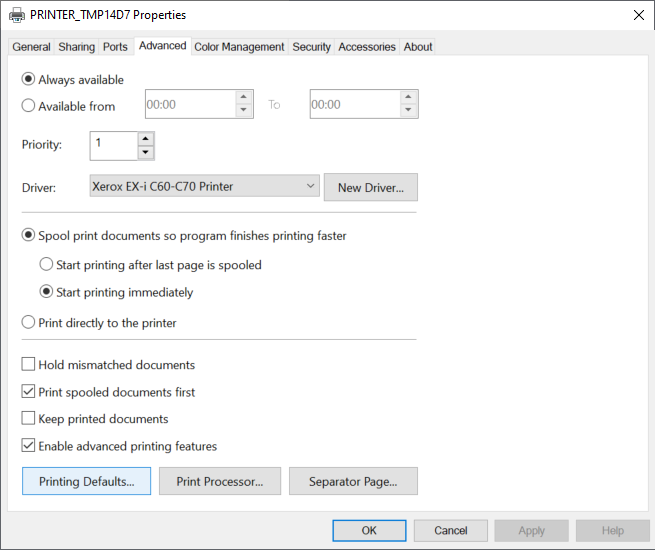
- Select OK.
Post your comment on this topic.