
You can automatically deploy Printix Client for Mac with Jamf Pro.
Download Printix Client for macOS
- Open the Software
![]() page.
page. - Select Printix Client to download it.
- Open Downloads, for example from the Dock at the bottom of the screen.
- Double-select CLIENT_{home}_{id}.DMG.
After a few seconds, the Printix Client dialog appears. - Copy the cardboard box icon (Printix Client.pkg) to a temporary location.
Jamf Pro
- Open a new browser window and sign in to Jamf Pro.
- In Jamf Pro, select Computers.
- On the Computers page, select Management Settings. Under Computer Management, select Packages.
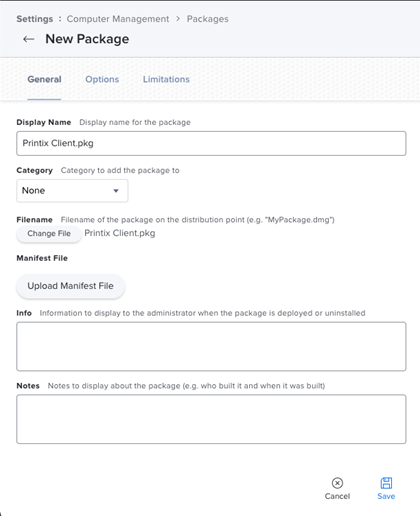
- Select New to add a new package.
- Under Filename, select Upload and select the Printix Client.pkg file that was copied in step 5.
- Navigate to Computers, Policies and select New to add a new policy.
- In the Options tab, specify the following settings:
- In Display name, type: Printix Client
- In Trigger, select: Recurring Check-in.
- In Execution frequency, select: Once per computer.
- Select Packages and select Configure.
- Find the newly added Printix Client.pkg package and select Add to add it to the policy.
- On the Scope tab, set the appropriate inclusions and exclusions.
- Select Save.
Post your comment on this topic.