
Once you have added the first users, you should consider using the below methods to deploy Printix Client and get users to print with and use Printix.
- Let users download Printix Client and register themselves
- Deploy Printix Client with Microsoft Endpoint Manager
- Deploy Printix Client for Mac with Microsoft Endpoint Manager
- Deploy Printix Client with Group Policies
- Deploy Printix Client and have sign in postponed until restart
- Deploy Printix Client for Mac
- Manually install Printix Client remotely
Let users download Printix Client and register themselves
The Printix Download page is the Printix Home of your company (acme) followed by /download
Example: https://acme.printix.net/download
- Make a group email to users
Use organization’s email system to write and send an email to the group of relevant recipients, perhaps all users in the organization. In the email you can include links to the Printix Download page, User Manual, and/or relevant Intranet page(s).
- Make a link on your Intranet
Perhaps your Intranet already features one or more pages with instructions on how to locate and install printers in your company. You may want to update these pages and include the link to the Printix Download page and User Manual.
If you have enabled self-registration you can also provide users with a link to the Printix Download page. After the completed installation of Printix Client, the user has to select Menu ![]() , Register
, Register ![]() , and then enter work email address, and follow the steps in the email to register.
, and then enter work email address, and follow the steps in the email to register.
Deploy Printix Client automatically with Microsoft Endpoint Manager
You can automatically deploy Printix Client with Microsoft Endpoint Manager. If you also enable Microsoft Entra authentication users are automatically registered the first time they sign in with their Microsoft work or school account.
See also: How to deploy Printix Client with Microsoft Endpoint Manager
Deploy Printix Client automatically with Group Policies
You can automatically deploy Printix Client with Group Policies in Active Directory. If you also enable Active Directory authentication users are automatically registered the first time they sign in with their network username and password.
Download the Printix Client Microsoft Installer (MSI) package:
- Open the Software
![]() page.
page. - Select Printix Client (MSI).
- After download move the MSI file to a shared folder that is available to all users.
To install it silently use the msiexec command and run it as administrator, that is, under the local system account.
msiexec /i CLIENT_{home}_{id}.MSI /quiet
After installation, the Printix ID is saved in Windows Registry.
Deploy Printix Client and have sign in postponed until restart
Use the /oms (On Machine Start) argument to deploy Printix Client without starting the user interface (PrintixClient.exe). Only the Printix Service (PrintixService.exe) is started.
msiexec /i CLIENT_{home}_{id}.MSI /quiet WRAPPED_ARGUMENTS=/oms
The computer with Printix Client will only be registered and listed in Printix Administrator once a user has signed in. Start the user interface (PrintixClient.exe) to get the user to sign in.
This method can be used to install Printix Client as part of an automated process (like Windows Autopilot) that completely configures a new computer before this is delivered to the user. This way, sign in is postponed until the user starts to use the computer.
Deploy Printix Client for Mac
How to deploy the embedded Printix Client.pkg file:
- Open the Software
![]() page.
page. - Select Printix Client.
- Open Downloads, for example from the Dock at the bottom of the screen.
- Double-select CLIENT_{home}_{id}.DMG.
After a few seconds the Printix Client dialog appears.
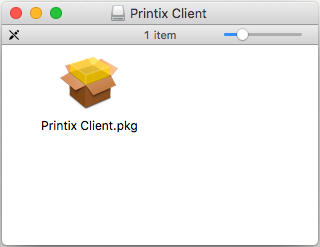
- Copy the cardboard box icon (Printix Client.pkg).
- Copy the cardboard box icon (Printix Client.pkg).
- Use whatever tool you have to deploy the .pkg file.
The macOS bundle identifiers are:
- Printix Client bundle ID: net.printix.UI
- Printix Service bundle ID: net.printix.MacService
See also:
- How to deploy Printix Client for Mac with Microsoft Endpoint Manager
- How to deploy Printix Client for Mac with Jamf Pro
- How to deploy Printix Client for Mac with Addigy
Manually install Printix Client remotely
If you can remotely sign in to a computer as administrator, then you can also install Printix Client. If there are signed in users you should ask them to sign out first. Otherwise these signed in users can not print to Printix printers, until they sign out of the computer and sign in again. You can sign out these users, but they may lose unsaved data. If you restart the computer after Printix Client is installed, it will also sign out the users from the computer.
How to sign out users from the computer
Windows ![]()
- Sign in to the computer as administrator.
- Open Task Manager.
- Select the Users tab.
- Select the user and select Sign out.
Mac ![]()
- Sign in to the computer as administrator.
- Select the search icon in the top right corner or select Command ⌘ – space.
- In Spotlight Search type: activity monitor, and press Enter.
- In Activity Monitor use the search box in the upper right corner and type: loginwindow
- Double-click the loginwindow process of the user to be signed out and select Quit.
- Select Force Quit. You may be asked to enter your Password.
Post your comment on this topic.