
Configure OneLogin
- Open a new browser window and sign in to OneLogin portal (onelogin.com), using your OneLogin administrator account credentials.
- In the OneLogin portal, select Administration.
- In the OneLogin Administration panel, select Applications.
- Select Add App.
- In Search, type OIDC and select the OpenId Connect app.
- In Display name, type: Printix.
- Upload icons:
- For Rectangular icon, we recommend this SVG:
https://assets.printix.net/img/logo/logo-simple.svg - For Square icon, we recommend this SVG:
https://assets.printix.net/img/logo/px-logo-circle.svg
- For Rectangular icon, we recommend this SVG:
- In Description, optionally, type: Printix Cloud Print Management Service
- Select Save.
- On the menu, select Configuration.
- In Redirect URI, paste the Redirect URI value you can copy to the clipboard on the OneLogin tab on the Authentication
![]() page in Printix Administrator.
page in Printix Administrator.
Alternatively, type: https://auth.printix.net/identity-providers/onelogin/signin/response
- In Redirect URI, paste the Redirect URI value you can copy to the clipboard on the OneLogin tab on the Authentication
- Select Save.
- On the menu, select SSO.
- Copy the Client ID. You need to paste it in step 22.
- Select Show client secret and copy the Client Secret. You need to paste it in step 23.
You can leave the remaining settings at the defaults.
Sign-in issues
If you face any sign-in issues with OneLogin:
- Log in to the OneLogin portal as an administrator.
- Go to Users > Users > Applications.
- In the Applications table, select the application you configured.
- Select Save.
Enable OneLogin authentication
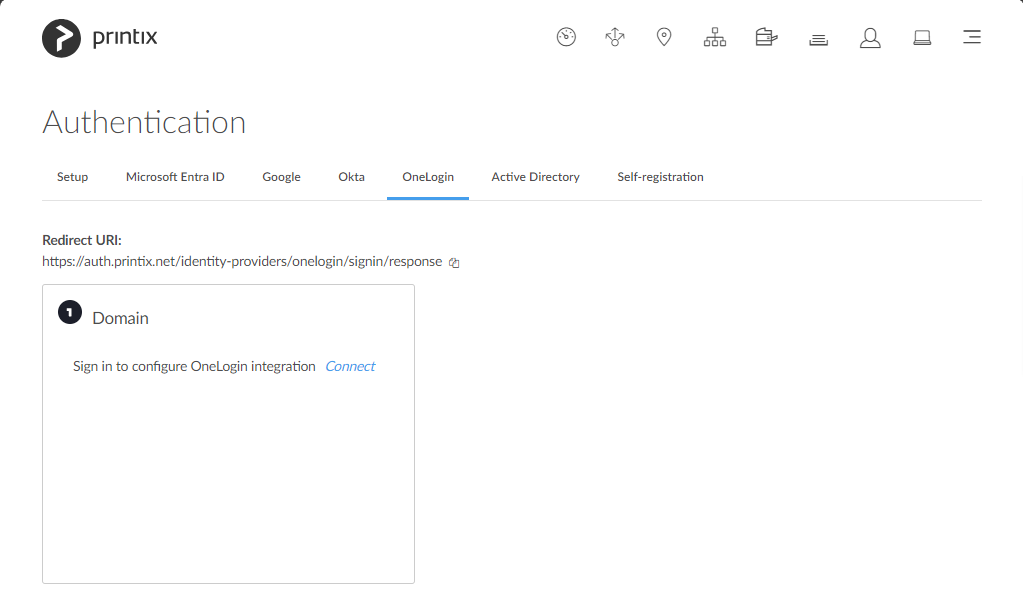
- In Printix Administrator on the Authentication
![]() page select the OneLogin tab.
page select the OneLogin tab. - Select Connect.
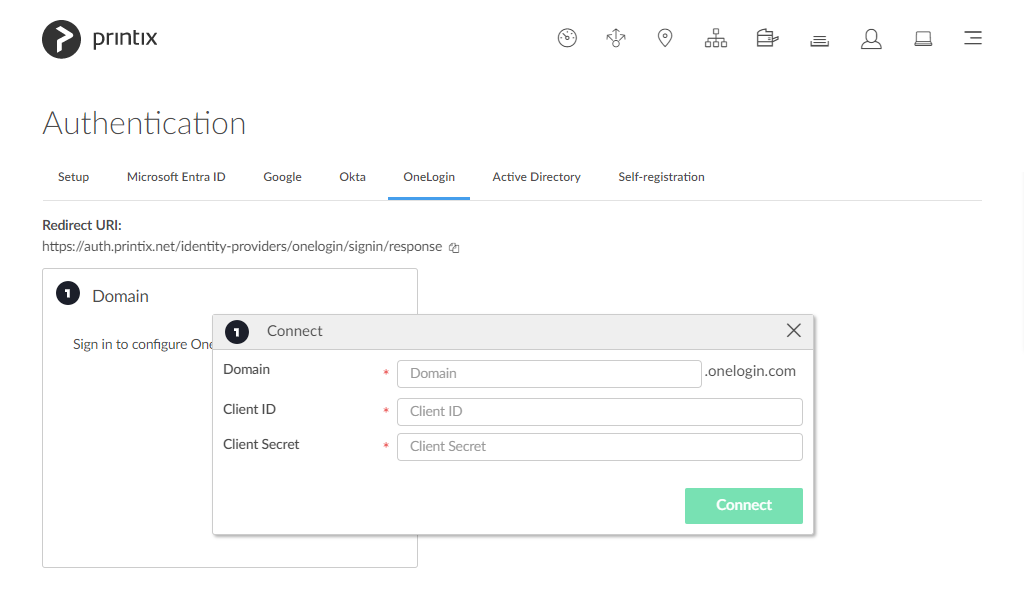
- In Domain enter your OneLogin domain (acme.onelogin.com).
- In Client ID paste the value you copied in step 13.
- In Client Secret paste the value you copied in step 14.
- Select Connect.
How to add multiple domains
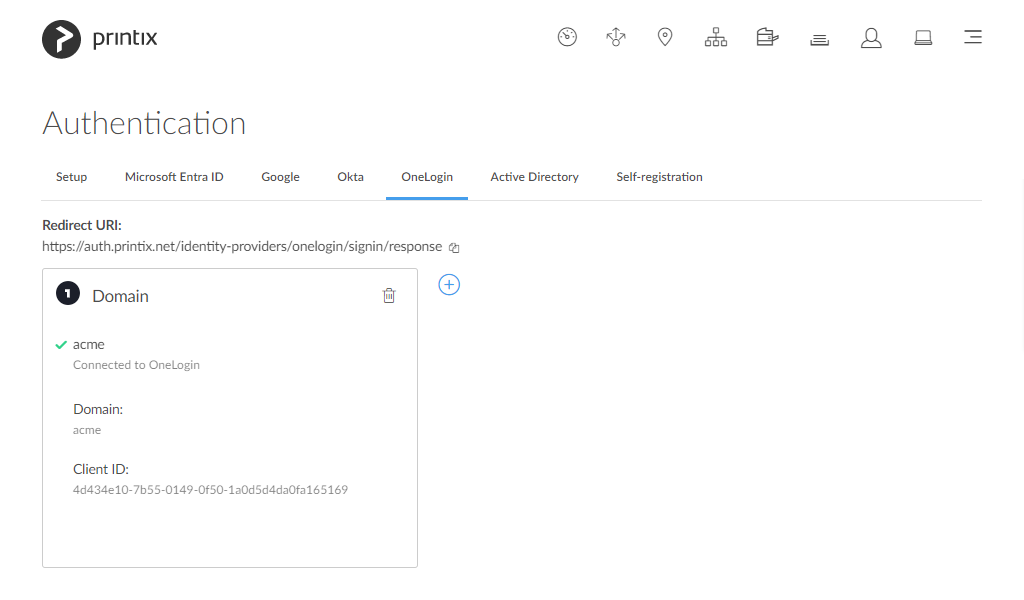
- Select Add
![]() to add another OneLogin domain.
to add another OneLogin domain.
Post your comment on this topic.