
Use the below steps to set up scan to email so users can scan and send emails to your company’s Microsoft 365 or Office 365 mailboxes. The steps are in accordance with option 2, as described in Microsoft documentation: How to set up a multifunction device or application to send email using Microsoft 365 or Office 365.
- Open a new browser window and sign in to Microsoft 365 admin center (admin.microsoft.com).
- On the navigation menu select Show all….
- Select Settings and then Domains.
- On the DNS records tab select your domain. Example: acme.com
- Write down the MX record POINTS TO ADDRESS value. You need the MX record in step 9.
Example: acme-com.mail.protection.outlook.com
- Open the printer’s web page and Log in as Administrator.
- On the menu select Settings.
- Select E-mail.
- Select E-mail Setup.
- In Primary SMTP Gateway type the value you obtained in step 5.
Example: acme-com.mail.protection.outlook.com - In Primary SMTP Gateway Port leave the value at 25.
- In Use SSL/TLS select Negotiate.
- In SMTP Authentication select No authentication required.
- In User-Initiated Email select User Session E-mail address and Password.
- In Primary SMTP Gateway type the value you obtained in step 5.
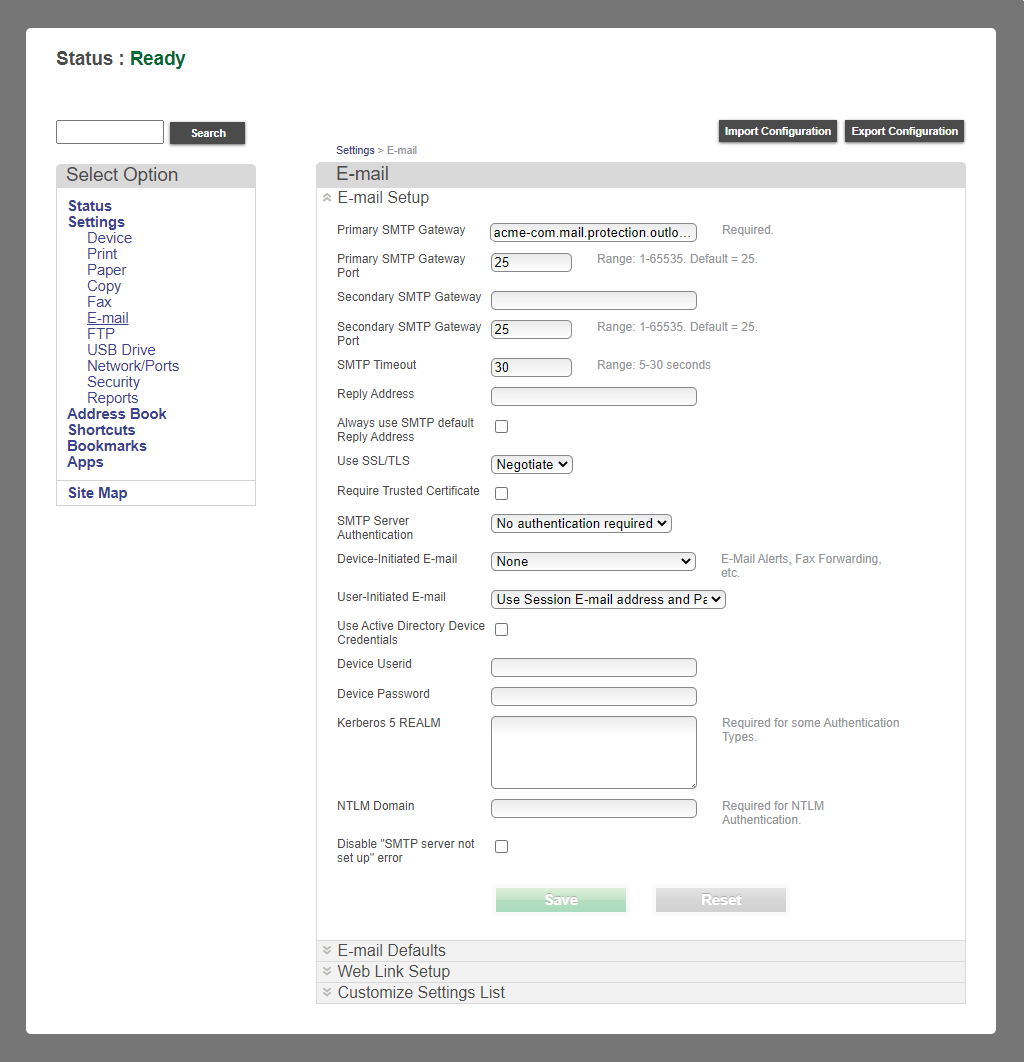
- Select Save.
Post your comment on this topic.