
Use the below steps to set up scan to email so users can scan and send emails to your company’s Microsoft 365 or Office 365 mailboxes. The steps are in accordance with option 2, as described in Microsoft documentation: How to set up a multifunction device or application to send email using Microsoft 365 or Office 365.
- Open a new browser window and sign in to Microsoft 365 admin center (admin.microsoft.com).
- On the navigation menu, select Show all….
- Select Settings and then Domains.
- On the DNS records tab, select your domain. Example: acme.com
- Write down the MX record POINTS TO ADDRESS value. You need the MX record in step 11.
Example: acme-com.mail.protection.outlook.com
- Open the printer’s web page and Login as Administrator.
- On the menu, select Device Management and then Configuration.
- In the Scanner section, select General Settings.
- For Login User Address Priority, select On.
- Select OK.
You return to the Configuration page. - In the Device Settings section, select E-mail.
- In Administrator Email Address, optionally, type the email address to be used as the default From: address.
- In Auto Specify Sender Name, select On and the signed in user’s email address is set as the From: address (sender). Select Off and the Administrator Email Address will be set as the From: address (default sender).
- In SMTP Server Name, type the value you obtained in step 5.
Example: acme-com.mail.protection.outlook.com - In SMTP Port No., leave the value at 25.
- In SMTP Authentication, select Off.
- Select OK.
Prefill From
As you are signed in with Printix, your email address is not automatically prefilled in the From field.
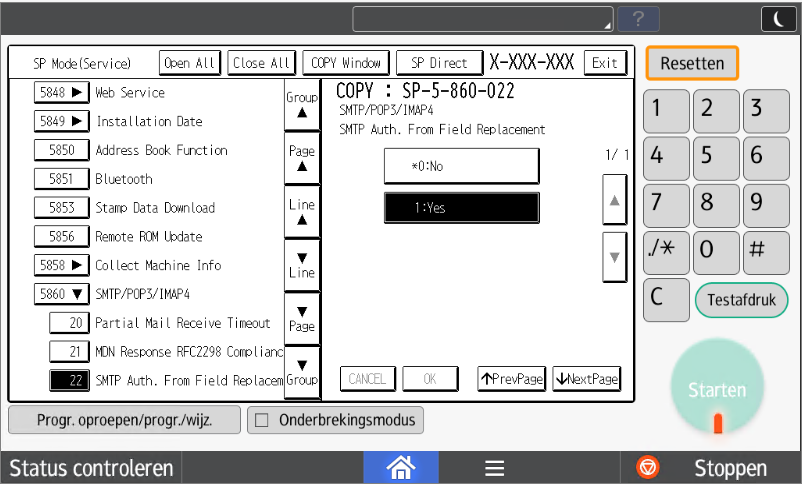
Some SMTP servers will reject sending the scanned documents if the email sender (From field) does not have a specific value, that is, the Administrator Email Address that can be specified in step 8 above. Also, the Ricoh printer must be brought into Service Program Mode to change the SP 5-860-022 (SMTP Auth From Field Replacement) to 1.
Address book
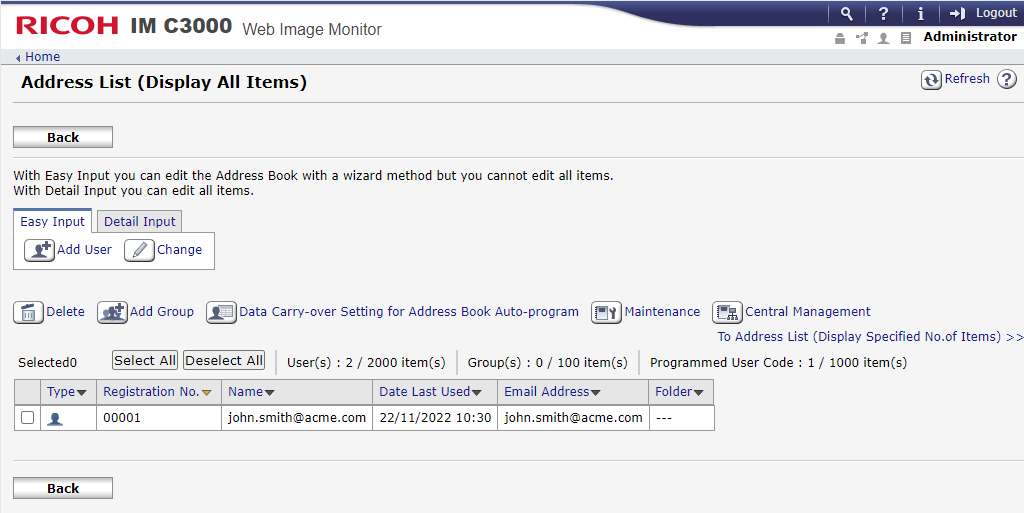
With Printix Go Ricoh version 2.0.0.27 or later signed in users are identified by their email address (Example: john.smith@acme.com) instead of previously by their name (Example: John Smith). First time a user signs in after an update from an earlier Printix Go verison like 0.4.10.0, a new entry is created in the Ricoh printer’s address book and the columns Name and Email Address will both show the user’s email address. Any previous address book entry of the user (by name) is no longer used and can be deleted by the administrator. Ricoh truncates the name to between 15 and 20 characters depending on the platform limitations.
Post your comment on this topic.