
Instead of using the print driver’s factory default settings, you can add your own print driver configuration. When the printer is added on the user’s computer, the configuration is added as well. That way, the user does not have to make these configuration changes. If you are satisfied with the print driver’s factory defaults, you do not need to make a print driver configuration.
Print driver configuration consists of:
- Device Settings
Specifies the availability of Installable Options (such as Paper trays, Duplexer, Staple, Hole punch, and Output bins), and for example Form to tray Assignment. If the print driver is a Universal print driver, you may have to select a Configuration tab and perhaps also set the Printer model.
- Printing defaults
Open the Advanced tab and select the Printing Defaults… button to configure per-printer defaults. Printing defaults include Advanced Document Settings (such as Print 2-sided, and Print in black), and for example, Finishing Options.
See also:
- How to add a new print driver configuration
- How to rename a print driver configuration
- How to modify a print driver configuration
- How to delete a print driver configuration
- How to configure anywhere print queue to use universal print driver
- Universal print drivers
How to add a new print driver configuration
Windows ![]()
Print driver configurations can be made using these methods:
- Configure on computer: The print driver configuration is interactively configured on a computer via the Windows Printer properties dialog of a temporarily added Windows printer.
- The computer must be online and MUST be on the same network as the printer.
- The print driver configuration is made interactively via the Windows Printer properties dialog.
- You and only you (same user as in Printix Administrator) must be signed in to Printix Client on the computer.
- Upload from computer: The print driver configuration is uploaded from the selected Windows computer.
- The computer must be online and the print queue MUST be installed on the computer already.
- The print driver configuration is made in advance via the Windows Printer properties dialog.
Mac ![]()
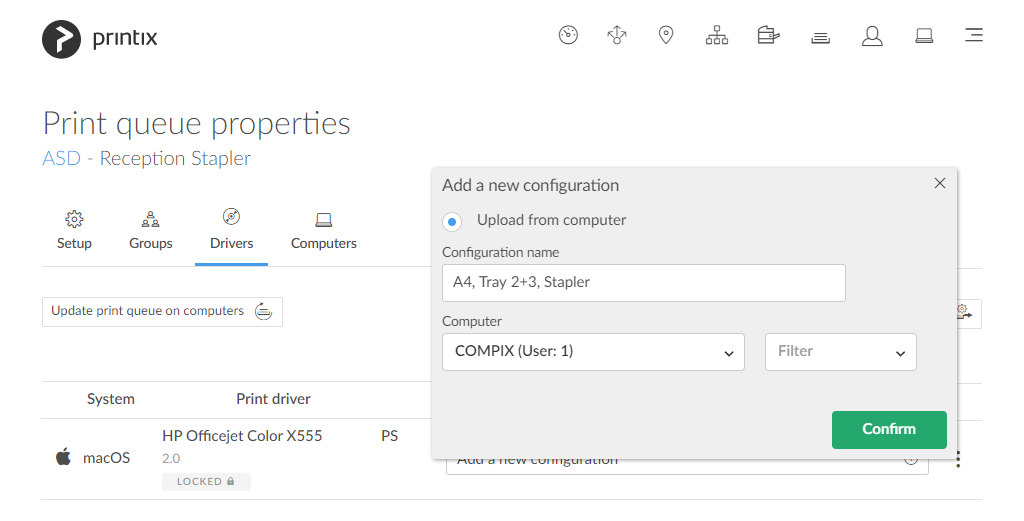
- Upload from computer: Print driver configuration is uploaded from the selected macOS computer.
- The computer must be online and the print queue MUST be installed on the computer already.
- The print driver configuration is made in advance with CUPS.
How to configure print driver configuration on a Windows computer
- Open the Print queue properties
![]() page.
page. - Select the Drivers
![]() tab.
tab. - Identify the System. Example: Windows 10 ×64.
- Select Add a new configuration
![]()
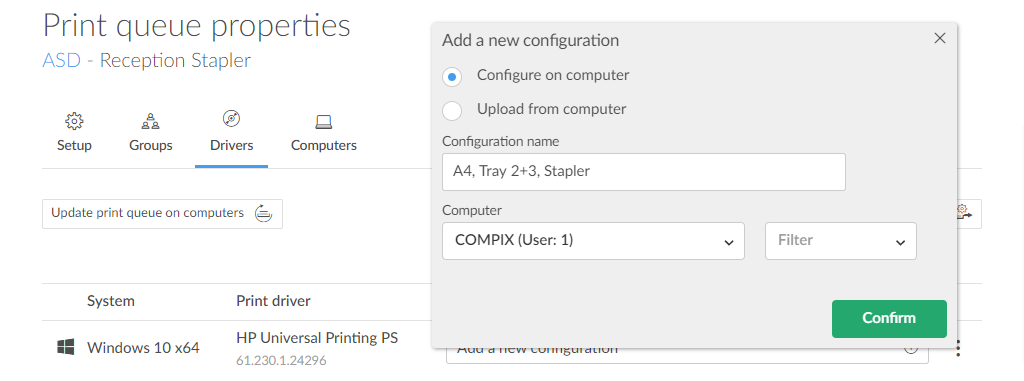
- In the Add a new print driver configuration dialog:
- Select Configure on computer to make the configuration via a temporary printer’s properties dialog.
- Enter Configuration name. Example: A4, Tray 2+3, Stapler.
- Select the Computer you want to use to make the configuration. You and only you must be signed in to the computer.
- If there are computers where there are also other users signed in, you can not select these (dimmed). Example: COMPIX (Users: 2)
- If the Select computer list is empty, it is because you are not signed in to Printix Client on a computer that match the System (Windows 10 ×64).
- For best user experience, open Printix Administrator on the same computer you want to modify the print driver configuration on.
- If you are remotely signing in to the computer, we recommend you also open Printix Administrator on the computer.
- Select Confirm.
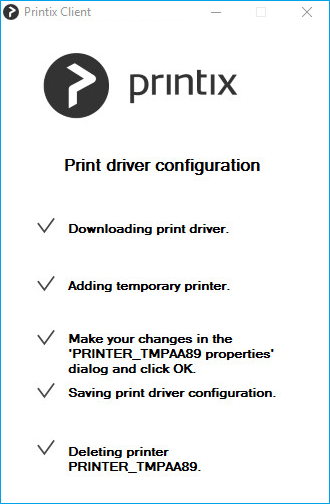
- On the computer Printix Client, open the Print driver configuration dialog to show the progress:
- Downloading print driver
This may take several minutes depending on the size of the print driver and the speed of your Internet connection. - Adding temporary printer
- Downloading print driver
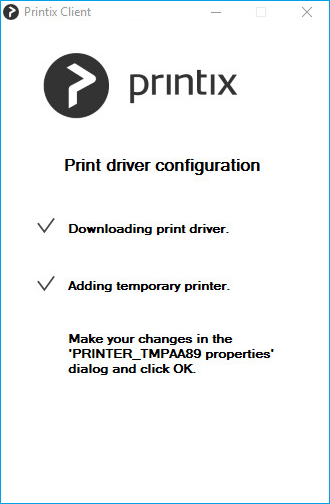
- Make your changes in the PRINTER_TMPxxxx properties dialog. Make sure to make you changes within 10 minutes, as the dialog is closed automatically.
- Your view of the dialog may be blocked by other windows. Select the Alt + Tab keys to switch between windows.
- Open the Device Settings tab to configure Installable Options and Form to Tray Assignment.
- See the section Print drivers for detailed instructions.
- Open the Advanced tab and select the Printing Defaults… button to configure per-printer defaults.
- See the section Print drivers for detailed instructions.
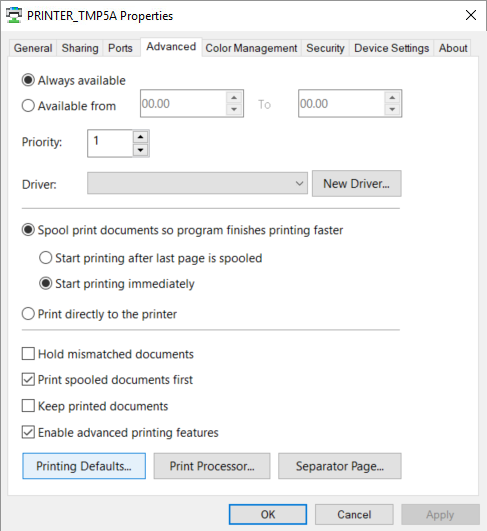
- Select OK.
- Saving print driver configuration.
The print driver configuration is uploaded to the Printix Cloud. - Deleting printer PRINTER_TMPxxxx.
The temporary printer is removed from the computer.
- Saving print driver configuration.
- In Printix Administrator:
- The print driver configuration is selected.
- The print driver selection is locked
![]()
- Use Update print queues to make the changes take effect on computers where the print queue is already installed.
How to upload print driver configuration from a Windows computer
- Open the Print queue properties
![]() page.
page. - Select the Drivers
![]() tab.
tab. - Identify the System. Example: Windows 10 ×64.
- Select Add a new configuration
![]()

- In the Add a new print driver configuration dialog:
- Select Upload from computer.
- Enter Configuration name. Example: A4, Tray 2+3, Stapler.
- Select an online Computer you want to upload the configuration from.
- The print queue MUST be installed on the computer already.
- Optionally, select Filter to filter on the type of computer (Desktop, Laptop and Server).
- Select Confirm.
The print driver configuration is uploaded to the Printix Cloud.
- In Printix Administrator:
- The print driver configuration is selected.
- The print driver selection is locked
![]()
- Use Update print queues to make the changes take effect on computers where the print queue is already installed.
How to rename a print driver configuration
- On the Print queue properties page, select the Drivers
![]() tab.
tab. - Identify the System. Example: Windows 10 ×64.
- Select the Modify
![]() icon.
icon. - Edit the Configuration name.
- Select Save.
How to modify a print driver configuration
- On the Print queue properties page, select the Drivers
![]() tab.
tab. - Identify the System. Example: Windows 10 ×64.
- Select the Setup
![]() icon.
icon. - In the Modify print driver configuration dialog, follow the same steps as in Add a new print driver configuration.
How to delete a print driver configuration
- On the Print queue properties page, select the Drivers
![]() tab.
tab. - Identify the System. Example: Windows 10 ×64.
- Select the Delete
![]() icon.
icon. - Select Yes to delete the configuration.
Post your comment on this topic.