

On the Analytics ![]() tab, you can configure access to data for analysis and reporting. Data can be extracted into your own database or you can choose to access it from the Printix Cloud. Data can be viewed and analyzed with Printix Power BI solution or a tool of your own.
tab, you can configure access to data for analysis and reporting. Data can be extracted into your own database or you can choose to access it from the Printix Cloud. Data can be viewed and analyzed with Printix Power BI solution or a tool of your own.
To get here:
- Select Menu
![]() , Settings
, Settings ![]() .
. - Select the Analytics
![]() tab.
tab.
See also:
- How to extract data to Printix database
- How to extract data to own database
- How to set up Power BI
- How to interact with the Printix Power BI report
- How to include scan details in data extracts
| Printix database | Own database | |
|---|---|---|
| Data is kept for | 30 days | 90 days or forever |
| Data extracts | 2 times per day | 4 times per day |
Database
- Database server address
The address of the database server.
- Database name
The name of the database.
- Database server port
The TCP port to access the database. The default is 1433.
- Username
The username used to access the database.
- Password
The password used to access the database.
Test database connection
- Select Test to test the connection to the database.
Deactivate extraction to database
- Select Deactivate to stop extracting data to the database.
You can select Activate if you want to start the extraction of data again.
Delete database extraction profile
- Select Deactivate to stop extracting data to the database.
- Select Delete to delete the database extraction profile.
The deletion of your Printix database happens automatically after you cancel subscription. If you are using an own database, you are responsible for deleting the actual database yourself.
How to extract data to Printix database
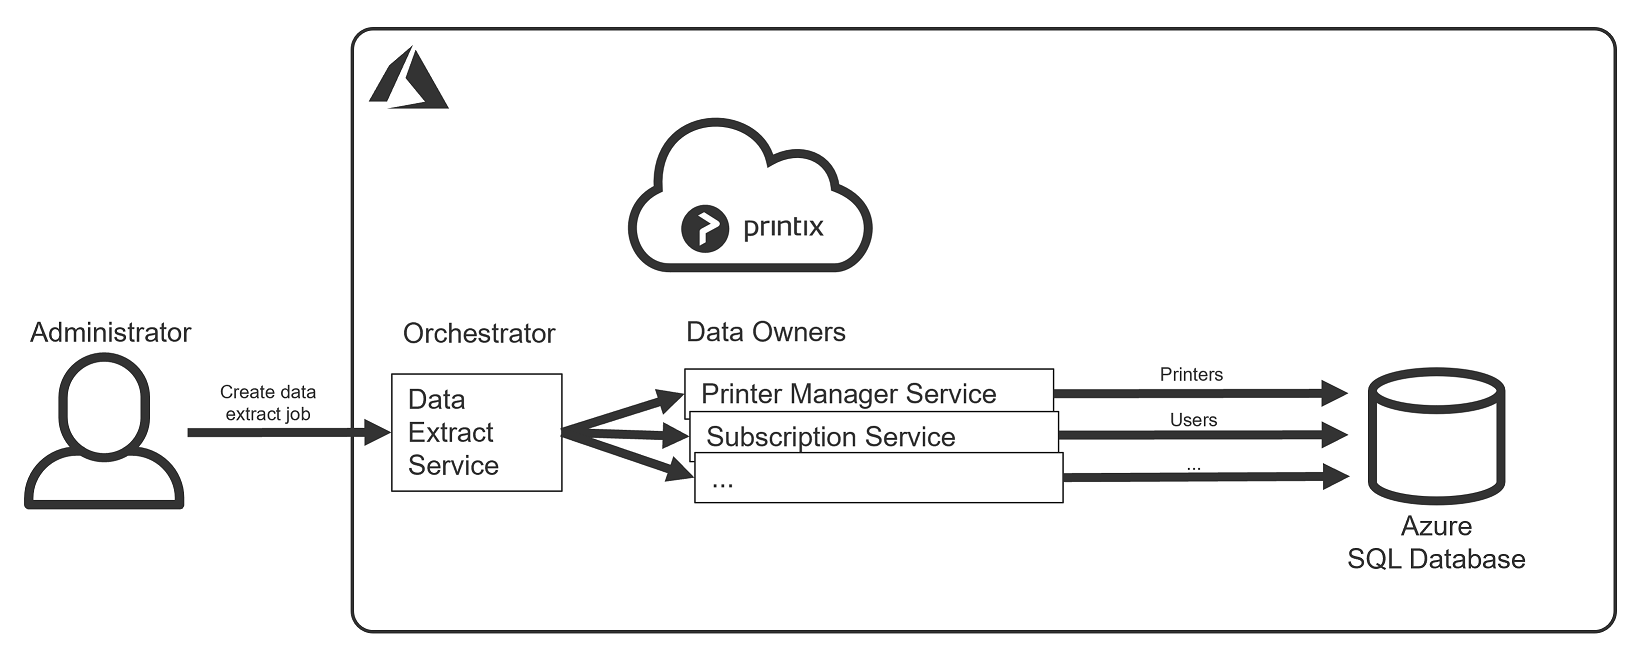
- On the Settings
![]() page, select the Analytics
page, select the Analytics ![]() tab.
tab. - In the Printix database section, select Create.
- When the database is created, you will see:
- Database server address, the address of the database server.
- Database name, the name of the database.
- Database server port, TCP port 1433.
- Username, the username used to access the database.
- Password, the password used to access the database.
- Optionally, check Include document name in data extract.
- Select Activate to start extracting data to the database.
- Copy the configuration items one by one and use them to set up the Printix Power BI solution or a tool of your own.
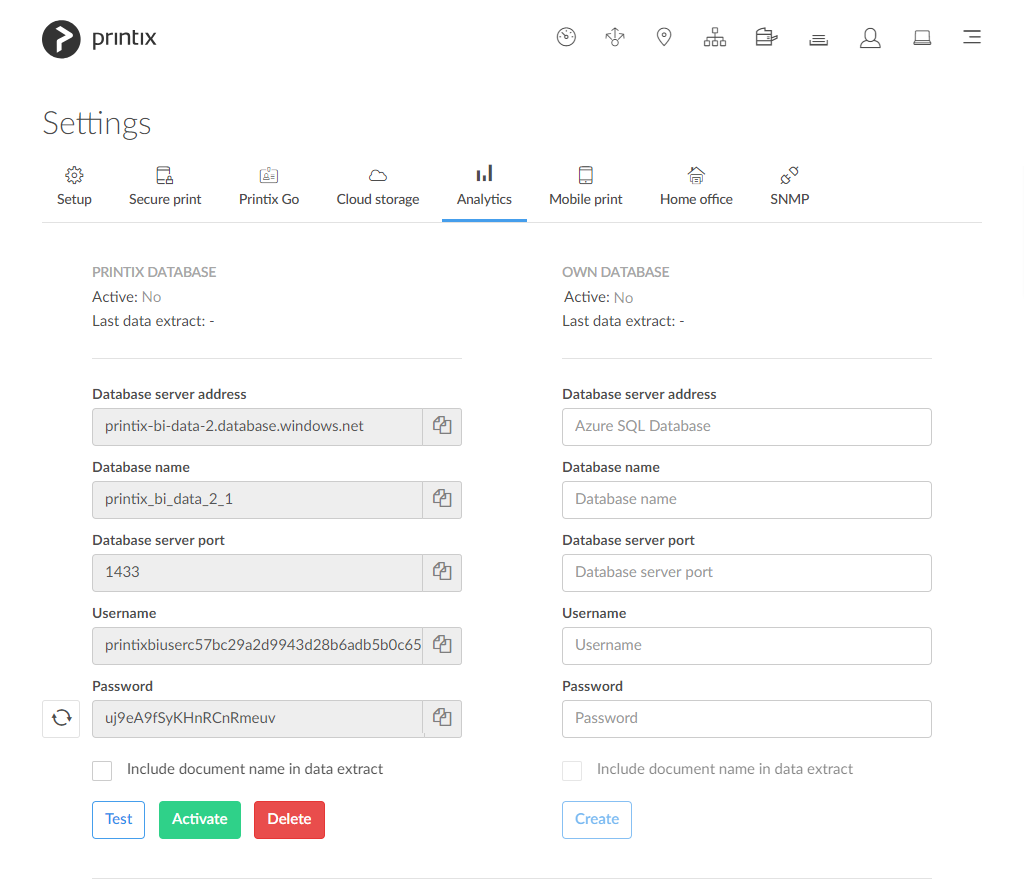
*If required, you can select Reset password ![]() to generate a new password. Access to the database will stop working until you have updated the Printix Power BI solution or your own tool with the new password.
to generate a new password. Access to the database will stop working until you have updated the Printix Power BI solution or your own tool with the new password.
How to extract data to own database
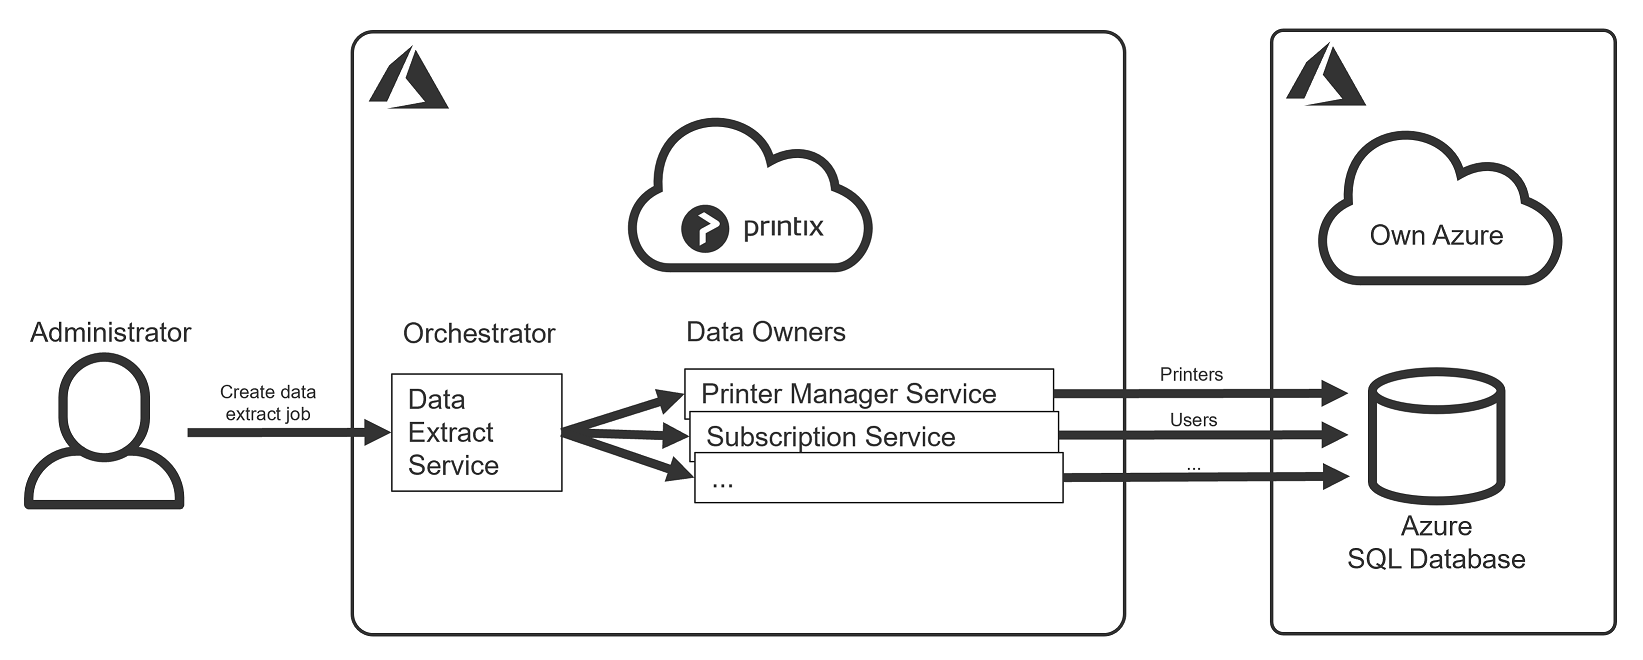
- Create the Azure SQL Database you want to use for this purpose.
- A good starting point is a database with 20 DTUs (Database Transaction Units).
- The database user should have the database role
db_owner. Alternatively, you can give the database user these three fixed database roles:db_datareader,db_datawriteranddb_ddladmin. Specifically, the database user, as a minimum, needs these database permissions:- CREATE TABLE
- GRANT SELECT ON DATABASE
- GRANT INSERT ON DATABASE
- GRANT UPDATE ON DATABASE
- GRANT DELETE ON DATABASE
- Firewall rules. By making Azure SQL accept 0.0.0.0 as a firewall source, will enable Printix (an Azure service) to pass through the server-level firewall rule and attempt to connect the Azure SQL database.
- On the Settings
![]() page, select the Analytics
page, select the Analytics ![]() tab.
tab. - In the Own database section:
- In Database server address, enter the address of the database server.
- In Database name, enter the name of the database.
- In Database server port, enter the TCP port to access the database. The default is 1433.
- In Username, enter the username to access the database. See database role above.
- In Password, enter the password to access the database.
- Select Create.
- By default, data is kept for 90 days. Optionally, check Keep data forever.
- Optionally, check Include document name in data extract.
- Select Activate to start extracting data to the database.
- Copy the configuration items one by one and use them to set up the Printix Power BI solution or a tool of your own.
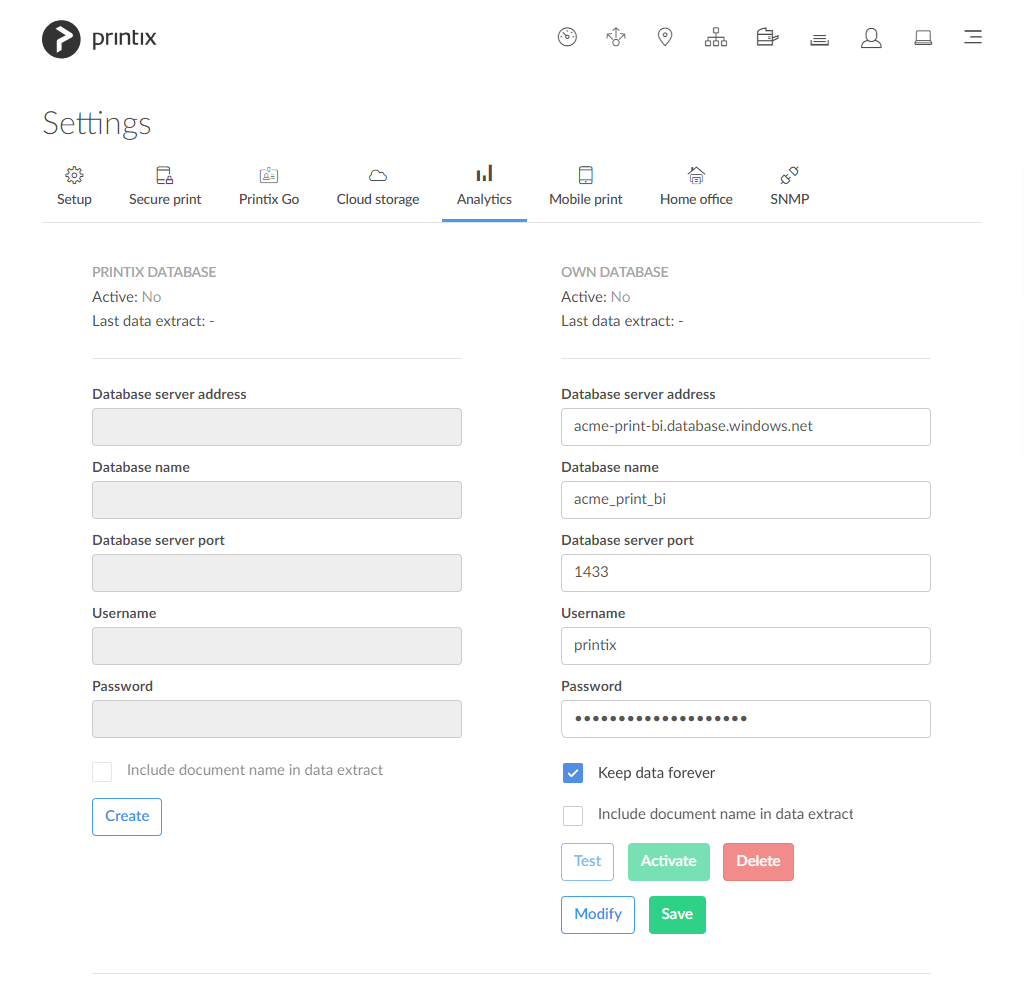
Modify own database
- Select Deactivate to stop extracting data to the database.
- Select Modify to modify the database.
- Select Save.
You can select Activate if you want to start the extraction of data again.
How to include scan details in data extracts
Printix Power BI version 2.0 introduces the new page User – Scan Details. If you have had Analytics enabled prior to the release of Power BI version 2.0 (March 2023) and you want to include scan details in the extracted data going forward, then you need to:
- Write down the details from the current configuration as you will need them in step 4:
- Database server address.
- Database name.
- Database server port.
- Username.
- Password.
- Select Deactivate to stop extracting data to the database.
- Select Delete delete the database extraction profile.
- Select Create to create the database again (enter the information you wrote down in step 1). This will modify the database to record scan details also.
- Select Activate to start the extraction of data again.
Scan details are recorded for:
- Printix Go printers that has been updated to and use Printix Capture.
See also:
Post your comment on this topic.