
On the SNMP ![]() tab, you can add, modify, and delete SNMP configurations. SNMP is only used to get/read information from printers. No set/write SNMP operations are performed.
tab, you can add, modify, and delete SNMP configurations. SNMP is only used to get/read information from printers. No set/write SNMP operations are performed.
To get here:
- Select Menu
![]() , Settings
, Settings ![]() .
. - Select the SNMP
![]() tab.
tab.
See also:
- How to add a SNMPv1 configuration
- How to add a SNMPv3 configuration
- How to add printers
- How to discover printers
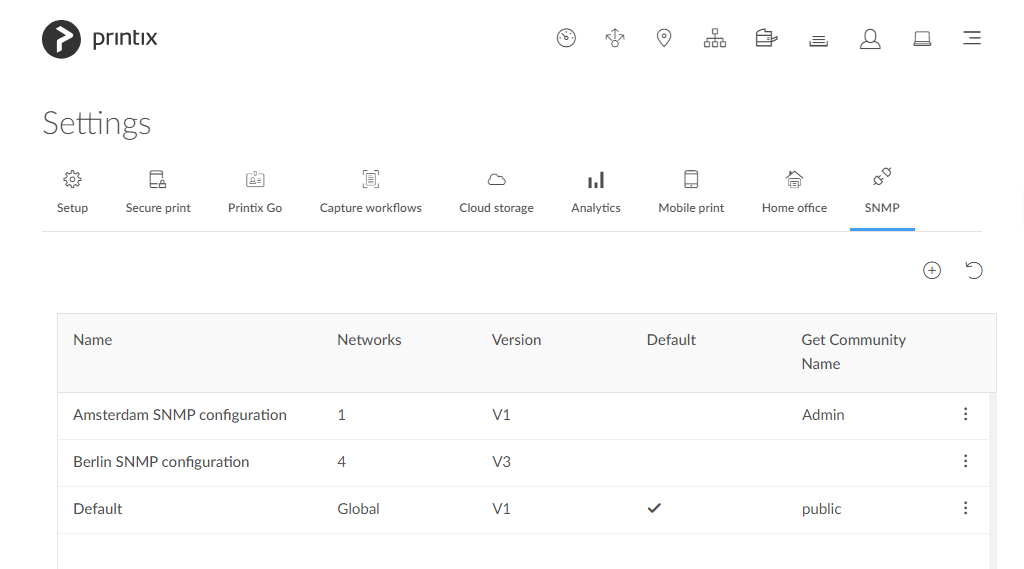
The list of SNMP configurations has the following columns:
- Name: The configuration name.
- Networks: Displays Global if the configuration is assigned to all networks. Otherwise, displays the number of assigned networks.
- Version: Displays V1 or V3 depending on the configuration version.
- Default: The default configuration displays a check mark. Other configurations are blank.
- Get Community Name: The community name of the printer.
The following functions are available:
- Select
![]() to start adding a new SNMP configuration.
to start adding a new SNMP configuration.
The Add SNMP configuration dialog box appears. - Select
![]() to reload the list of SNMP configurations.
to reload the list of SNMP configurations.
The list is automatically refreshed after creating, updating, or deleting an SNMP configuration.
- Select an SNMP configuration’s Name or select More
![]() and SNMP configuration to open the SNMP configuration page.
and SNMP configuration to open the SNMP configuration page. - Select More
![]() and Delete to delete an SNMP configuration.
and Delete to delete an SNMP configuration.
You can also delete a configuration after selecting More![]() and SNMP configuration. See SNMP configuration.
and SNMP configuration. See SNMP configuration.
Site managers can add, modify, and delete SNMP configurations. However, it is limited what site managers can do.
- Site managers can see the following SNMP configurations, which they can assign to printers:
- SNMP configurations with Global networks assigned
- SNMP configurations with at least one managed network assigned
- Site managers can add, modify, and delete the following SNMP configurations:
- SNMP configurations with only managed networks assigned
Add SNMP configuration
When the Add SNMP configuration dialog box appears, select the version of the SNMP configuration to add:
- Version 1
- Version 3
Version 1
- Configuration name
The name of the SNMP configuration.
- Get Community Name
The default is “public”. On some printers, this may also be known as Community Name Read Only.
- Set Community Name
On some printers, this may also be known as Community Name Read/Write.
- Networks
- If the configuration should be assigned to all networks, set it to Global.
- If the configuration should be assigned to specific networks only, select Select, then select the appropriate networks.
Version 3
- Configuration name
The name of the SNMP configuration.
- Username
The SNMP username can contain up to 31 characters in length and include any combination of alphanumeric characters (uppercase letters, lowercase letters, and digits). Space is not allowed.
- Security level
Select one of the following security levels for communication:- No authentication and no privacy
- Authentication and no privacy
- Authentication and privacy
Depending on the selected Security level, it is required to also configure Authentication and Privacy protocol.
- Networks
- If the configuration should be assigned to all networks, set it to Global.
- If the configuration should be assigned to specific networks only, select Select, then select the appropriate networks.
Authentication
- Authentication protocol
Select one of the hashing algorithms:- SHA (Secure Hash Algorithm)
- MD5 (Message-Digest algorithm 5)
- Authentication key
The key used with the selected Authentication protocol.
Privacy protocol
- Privacy protocol
Select one of the encryption algorithms:- DES (Data Encryption Standard)
- AES (Advanced Encryption Standard)
- Privacy key
The key used with the selected Privacy protocol.
Context name
The context name depends on the printer vendor.
See also:
Post your comment on this topic.