
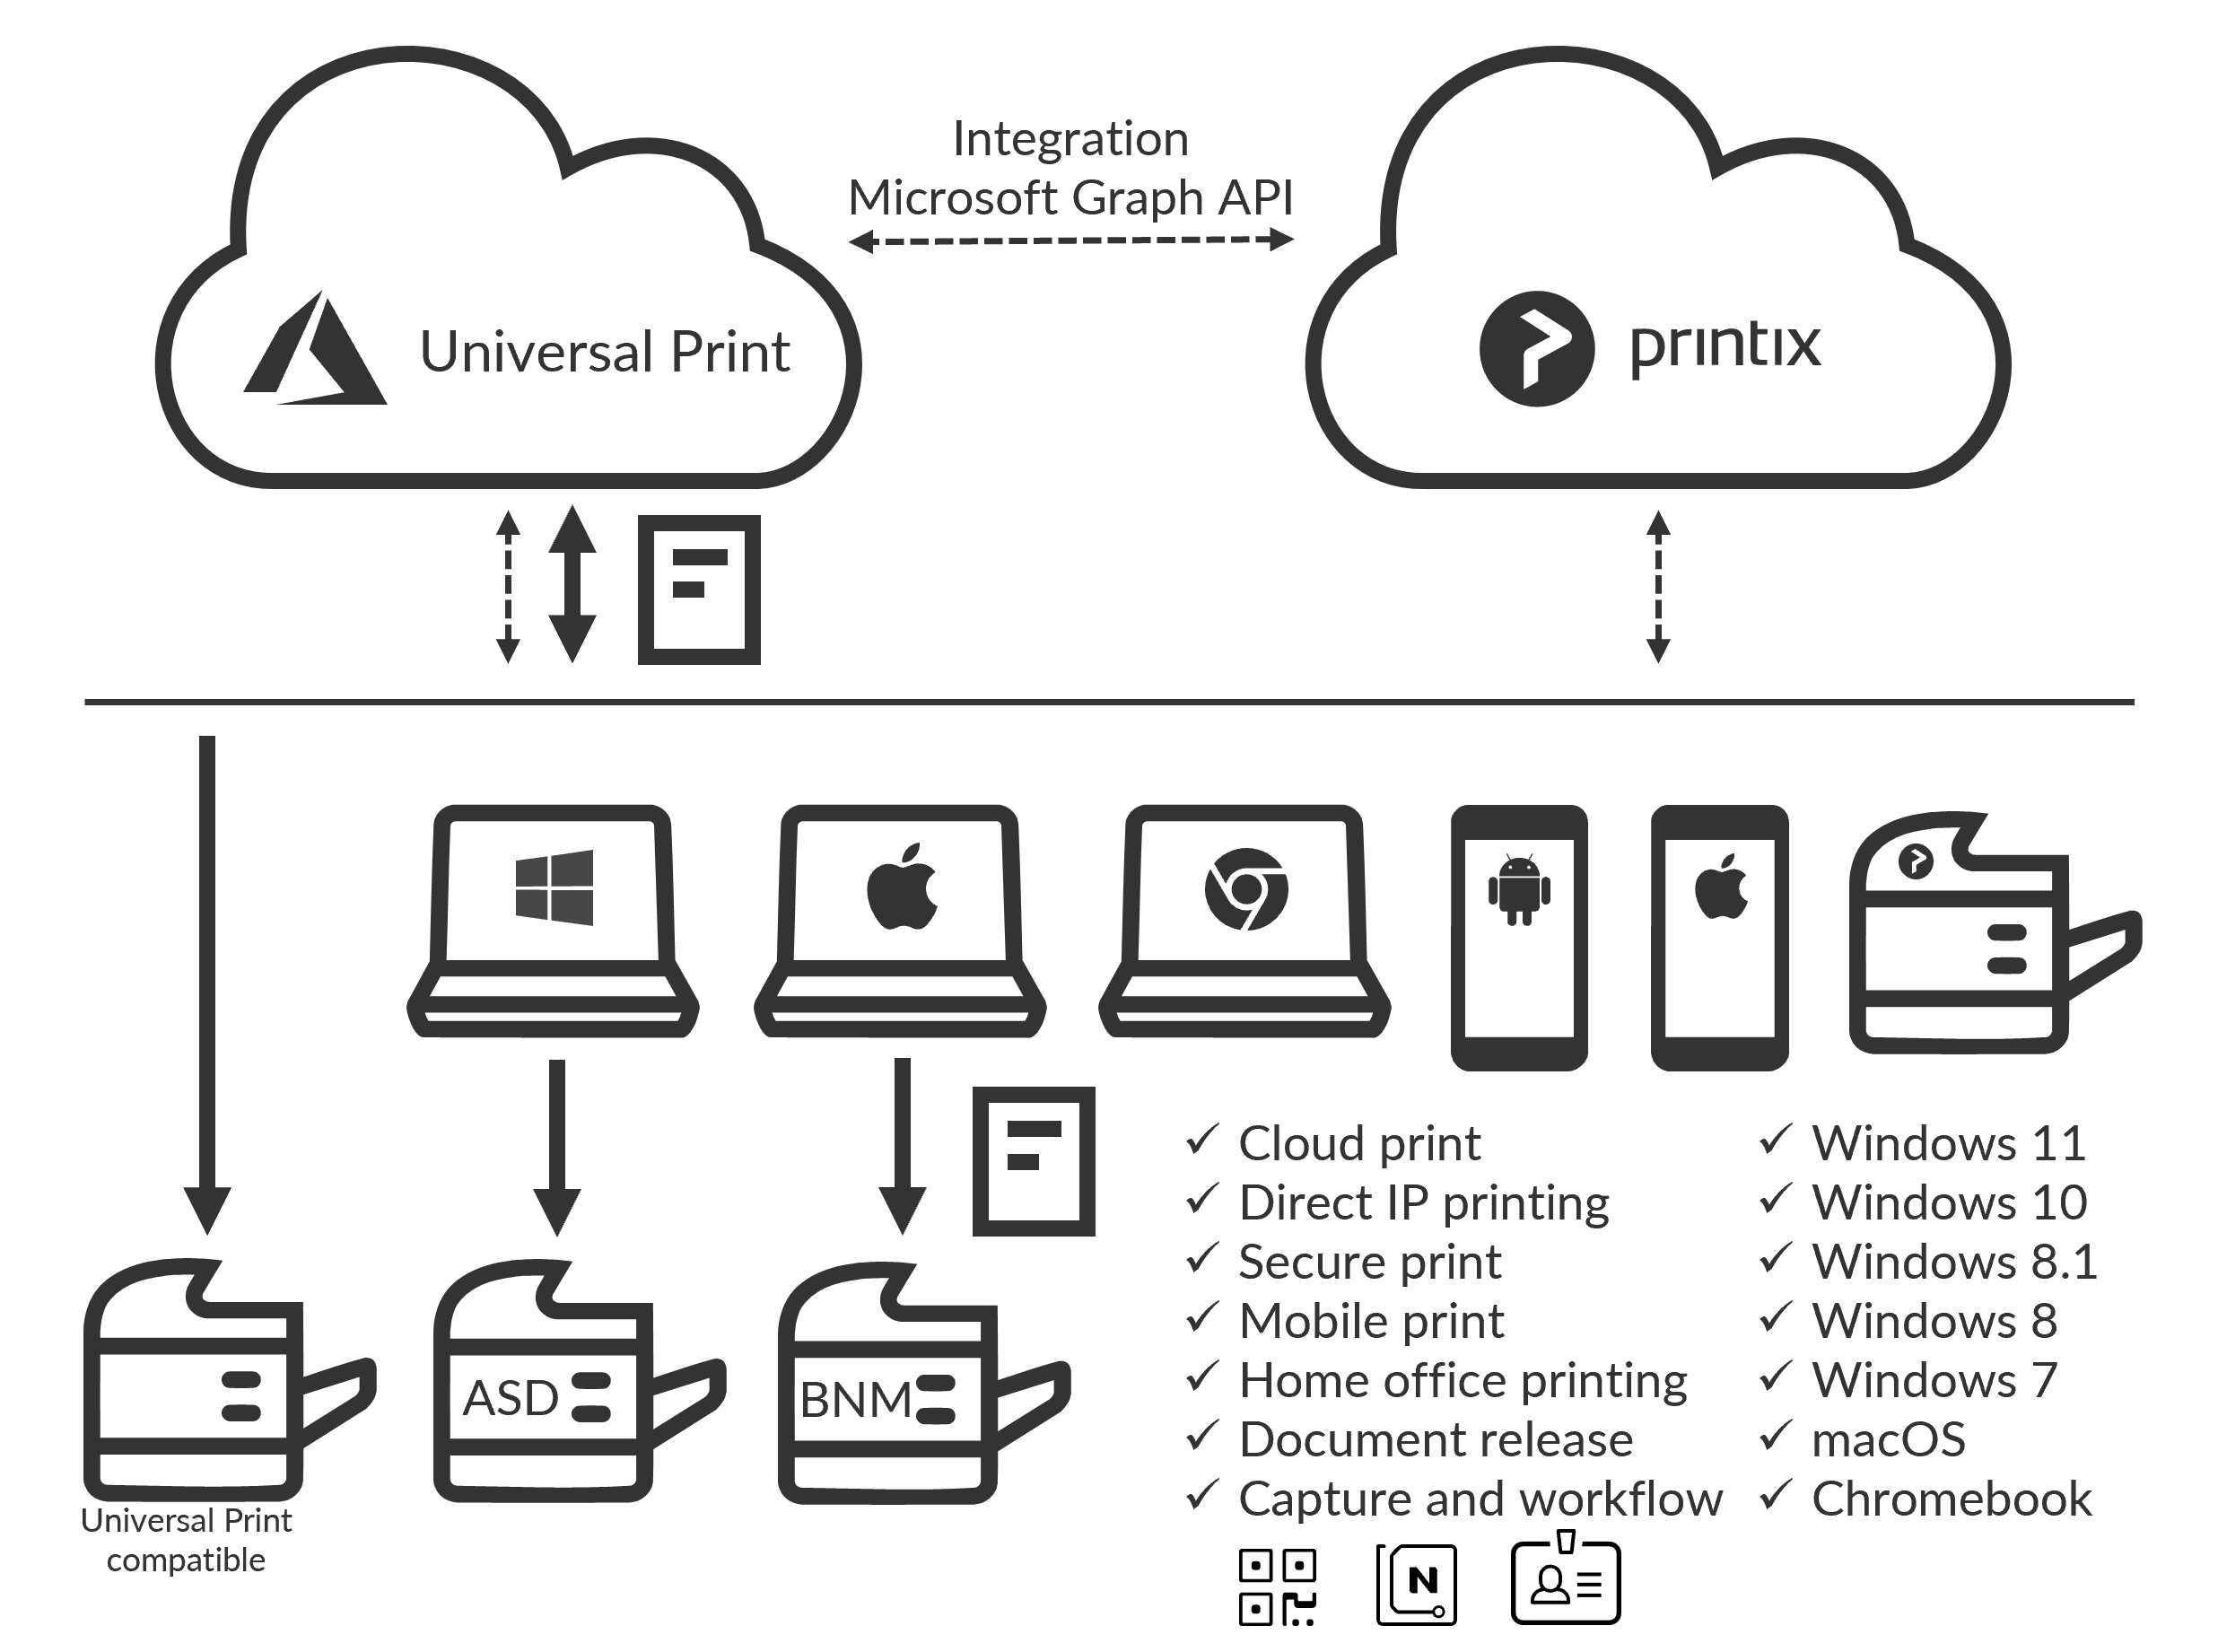
Printix integrates with Universal Print by Microsoft and runs on Microsoft Azure.
- Requirements
- Features
- How to assign the Universal Print license to a user
- How to integrate with Universal Print
Requirements
- Microsoft Entra ID.
- An active Universal Print license for the same Microsoft Entra ID.
- Any user wishing to manage the universal printers within Universal Print will need to have the Printer administrator role assigned, or a higher level that contains this role.
- The Universal Print license must be assigned to the printer administrators.
- User’s computer is running Windows 10 version 1903 or later and is either:
Limitations
- There is support for one, but not multiple Microsoft Entra directories.
- Only one print queue per printer can be published with Universal Print.
- Documents submitted via Universal Print are tracked as 1 page documents.
- Exclusive access checked on the print queue in Printix Administrator is not carried through to the print queue published in Universal Print.
- Status of jobs is Cancelled instead of Completed due to limitation in Microsoft Graph API.
Features
Enhance your print management capabilities and print experience with Printix flexible printing:
- Secure print
Release documents from your phone with Printix App or from the touchscreen control panel of a printer that has Printix Go installed.
- Mobile print
Print from phones and tablets, Android and iOS/iPadOS, to Printix managed printers
- Microsoft Dynamics 365 Business Central
Setup Business Central to use Printix printers (print queues) published with Universal Print by Microsoft and thereby print via Printix and use for example Secure print. Business Central may need permission adjustments to allow full integration with Universal Print. Please see Microsoft for further assistance on this where needed.
Additionally Printix provides:
- Wide operating system support:
- Direct IP printing – Keep documents local and print when there is no Internet connection.
- Central print queue and print driver management with driver store in the cloud.
- Delegated print management.
- Analytics and reports (Microsoft Power BI).
Secure print
Release documents from your phone with Printix App or from the touchscreen control panel of a printer that has Printix Go installed.
- Printix Anywhere printer
![]()
If you publish and share a Printix Anywhere print queue you can print securely with Universal Print and Printix.- Your submitted document goes to the Microsoft Cloud.
- Printix Cloud is notified about your pending document.
- You can subsequently release the document to any Printix managed printer. The printer must have a print queue that has Via the cloud checked.
- Wait until you are at the printer and then use Printix App on your phone to release your documents. Printix App is available as a native app for Android and iOS/iPadOS phones and tablets, and as a web app that runs in a web browser on your phone, tablet and computer.
- If Printix Go is installed on the printer, then you can sign in with card or ID code and release documents from the touchscreen control panel of the printer.
- Other Printix printers (ASD, BNM, …)
Documents will print directly, unless All users must print securely is checked or you are a member of a Must print securely group.- Your submitted document goes to the Microsoft Cloud.
- Printix Cloud is notified about your pending document.
- If the document must be printed securely you can subsequently release the document at the particular printer.
- Wait until you are at the printer and then use Printix App on your phone to release your documents. Printix App is available as a native app for Android and iOS/iPadOS phones and tablets, and as a web app that runs in a web browser on your phone, tablet and computer.
- If Printix Go is installed on the printer, then you can sign in with card or ID code and release documents from the touchscreen control panel of the printer.
Mobile print
Print from phones and tablets, Android and iOS/iPadOS, to Printix managed printers enabled for mobile print.
How to assign the Universal Print license to a user
- Sign in to Microsoft Azure with an account that has administrator access.
- In the portal menu, select All Services.
- In the Identity category, select Microsoft Entra ID.
- In the left-hand menu, select Users.
- Search and select a user.
- Select
![]() Edit properties.
Edit properties. - On the Settings tab, check the Account enabled check boxes.
- For the Usage location, select the country of the user, then save the changes.
You return to the selected user’s overview page. - In the left-hand menu, select Licenses.
- Select + Assignments.
- Check the Universal Print check box and select Save.
How to integrate with Universal Print
Accept integration with Universal Print
This has to be done only once and by the global admin in Microsoft Entra ID.
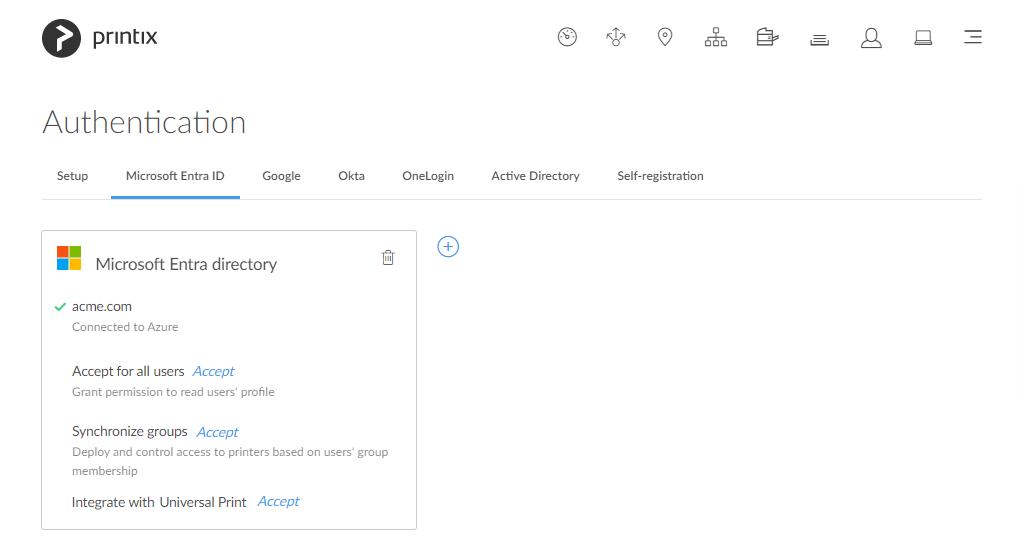
- In Printix Administrator on the Authentication
![]() page, select the Microsoft Entra ID tab.
page, select the Microsoft Entra ID tab.
One directory only is supported. - For now, it is a requirement that Synchronize groups must also be accepted.
- For Integrate with Universal Print, select Accept.
- On the Microsoft Sign in page:
- An active Universal Print subscription is required.
- Enter your printer administrator account. You must have the role as Printer Administrator to manage all aspects of printers in Universal Print.
- Enter Password.
- Select Sign in.
- Printix will ask you for permission to:
- Read and write print jobs.
- Read and write printer shares.
- Register, read, update, and unregister printers.
- Sign in and read user profile.
- Read, write and update print task definitions.
- Read and update printers.
- Read and write the properties and attributes of users’ printers.
- Read printers.
- Read the metadata and payload of users’ print jobs.
- Read and write the properties and attributes of printers.

- Select Accept to grant these permissions.
In Microsoft Azure, this will add the enterprise application Printix Universal Print.
Publish print queues with Universal Print
Once you have accepted integration with Universal Print, you can proceed to publish print queues with Universal Print.
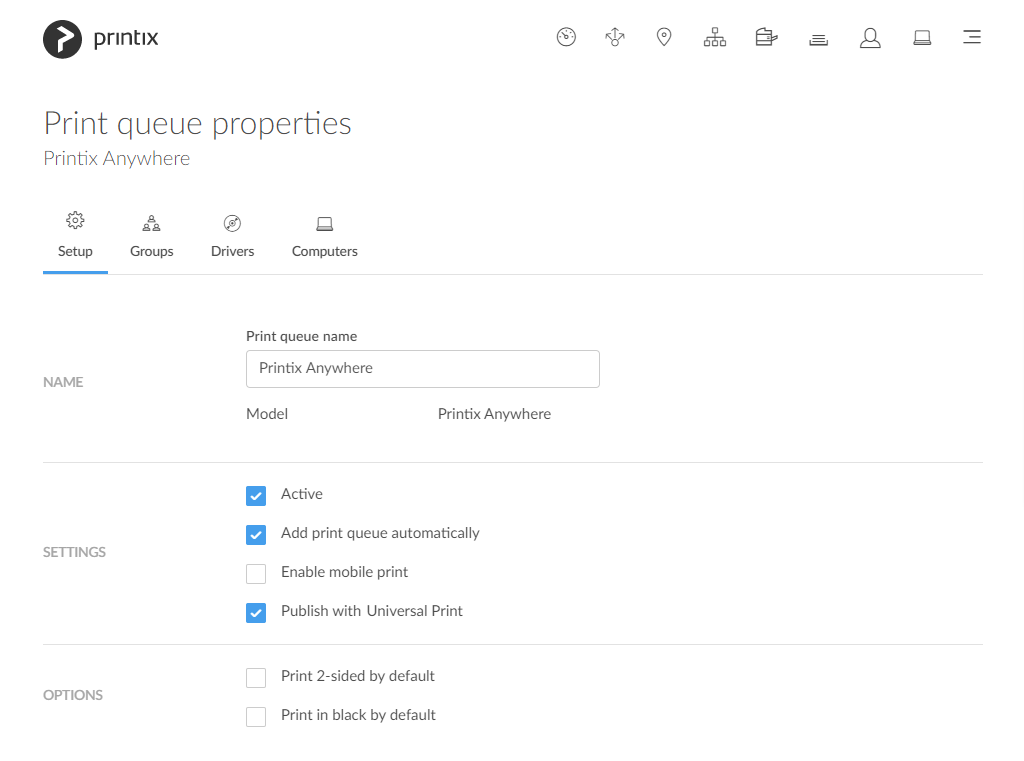
- In Printix Administrator open the Print queue properties page.
- It is possible to modify the properties of multiple print queues.
- Check Publish with Universal Print.
- The name of the print queue MUST be unique within Printix.
- There must NOT be a printer share with the same name in Universal Print.
- It is NOT possible to change the print queue name after the print queue has been published.
- If you unpublish the print queue the corresponding printer share is deleted in Universal Print.
- Select Save.
- Allow 1-2 minutes before the corresponding printer is added and the print queue is created as a printer share in Universal Print.
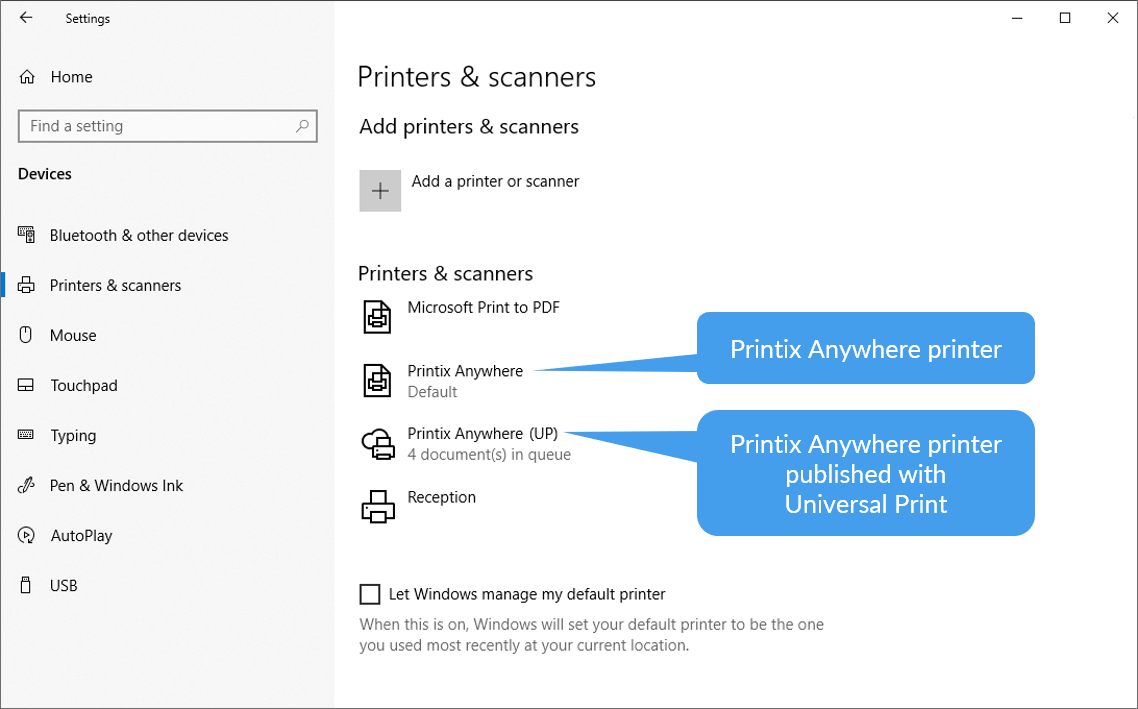
- The name of the printer share will contain (UP), which is short for Universal Print. Example: Printix Anywhere (UP)
Print queue naming

Native Printix managed print queue:
- Name can not be changed but is managed from Printix Administrator. Examples: Reception ASD, ASD Reception, and Reception.
- Port is an Internet Port. Example: http://localhost:21339/ipp/ASD/2114d3f3-e5732…
Printix print queue published with Universal Print:
- Name can not be changed once it is published. It will contain (UP), which is short for Universal Print. Examples: Printix Anywhere (UP), and Reception (UP).
- Port is an IPP Port. Example: IPP-eb47d31e-16f1-42f3-818s-f74a30c5…
- Driver and Model are Universal Print Class Driver.
In the Windows Add printer dialog any Universal Print printer appears as a Cloud printer.

In the Windows Printers & Scanners dialog the Universal Print printers appears with a distinct cloud icon.
How to see Printix printers in Universal Print
Optionally, see the printer share in Universal Print.
- Open a new browser window and sign in to Microsoft Azure (portal.azure.com), using your work account credentials.
- In the portal menu, select All Services.
- In the Management and governance category, select Universal Print.
- On the left pane, select Printer Shares.
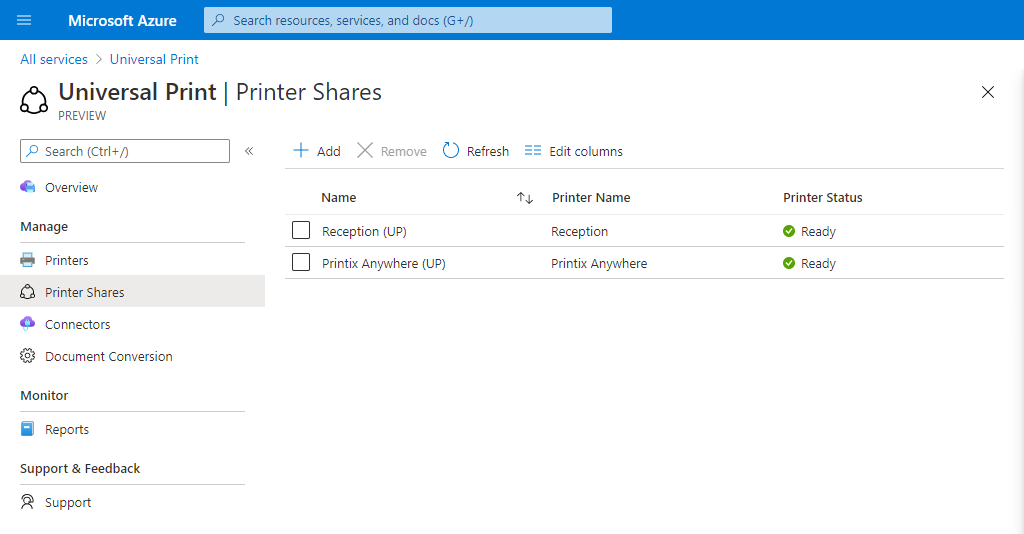
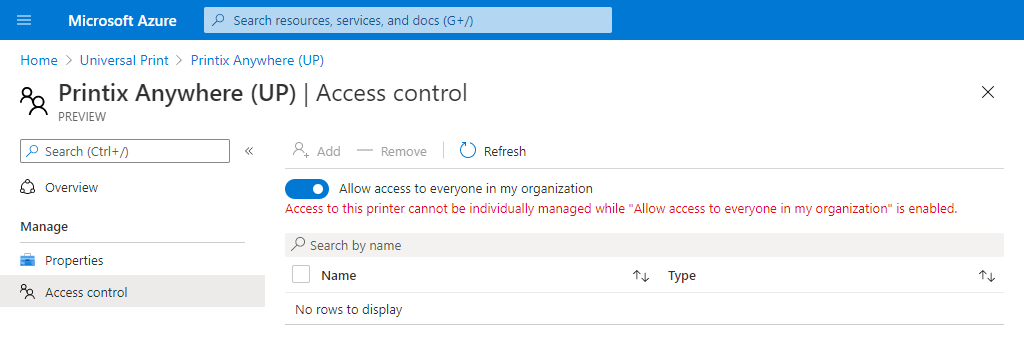
- Select the printer share. Example: Printix Anywhere (UP)
- Select Access control.
How to see print jobs in Universal Print
- On the left pane of the Universal Print page in Microsoft Azure, select Printers.
- Select the printer. Example: Printix Anywhere
- Select Jobs.

How to revoke the integration with Universal Print
- Uncheck Publish with Universal Print for all the print queues that has been published.
- The corresponding printer shares are deleted in Universal Print.
- Open a new browser window and sign in to Microsoft Azure (portal.azure.com), using your work account credentials.
- In the portal menu, select All Services.
- In the Identity category, select Microsoft Entra ID.
- On the left pane, select Enterprise applications.
- From the list, select Printix Universal Print.
- On the left pane, select Properties.
- Select Delete.
Post your comment on this topic.