
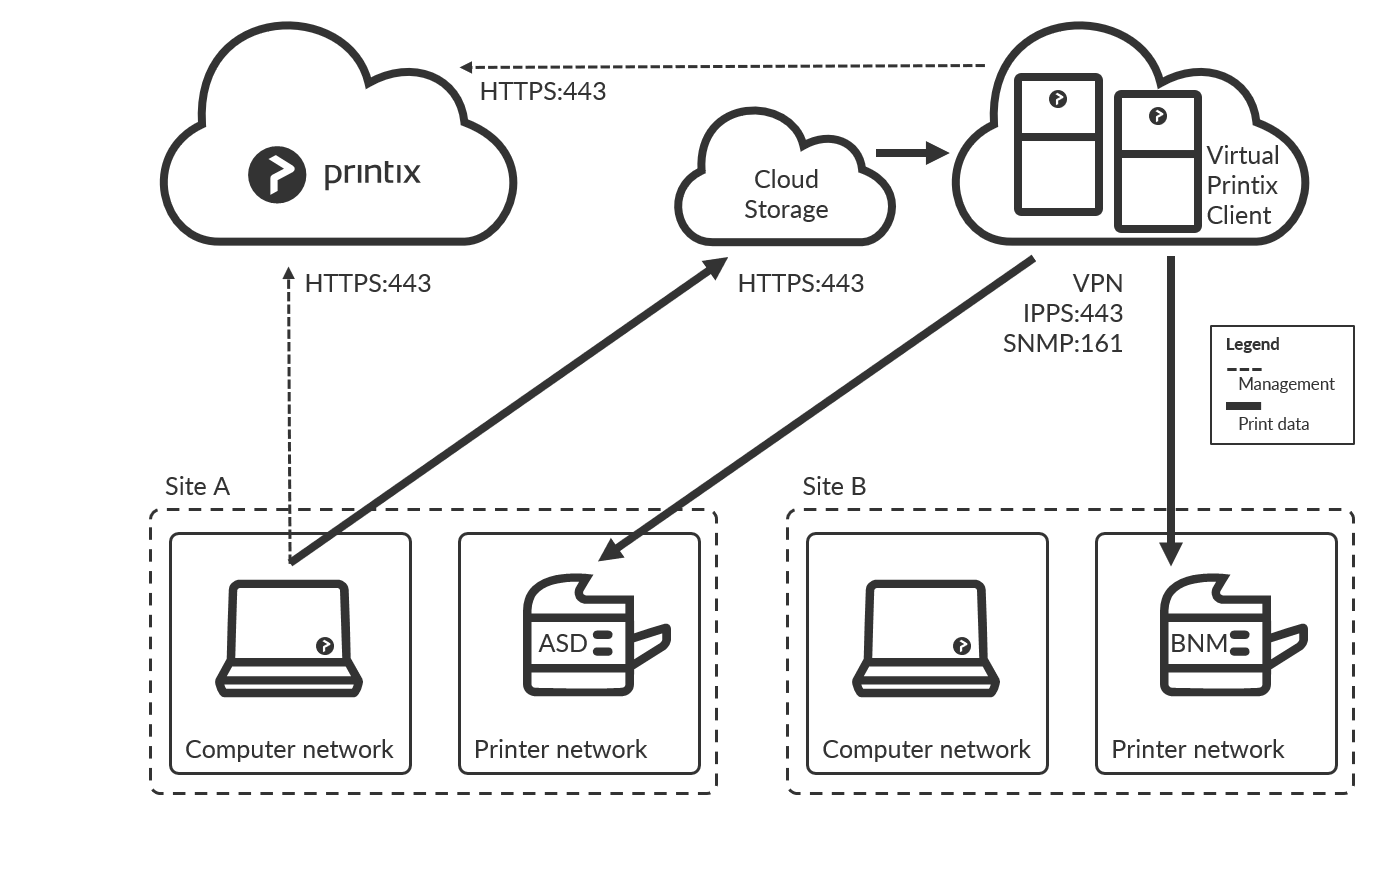
To print a document, a computer with Printix Client must be online on the same network as the printer. This may not be possible if it is required that printers and computers are kept on separate networks. To resolve this, you can run a computer, preferably a server, in the cloud, such as Azure. To make the Site A printers available to the computers on the Site A separate computer network, check Via the cloud and select On selected networks only and select the Site A computer network.
Printix Client is installed on the computer and the computer can route (via VPN) to the printers on the printers’ network(s). By adding the computer to the printers’ network Printix can print on those printers, even though there is no physical computer connected on the printer network. If you are concerned about resilience, you can add additional computers in the cloud.
- How to add a virtual Printix Client to a network
- How to add an additional virtual Printix Client to a network
- How to remove a virtual adapter from a computer
- Allow communication with the printers
How to add a virtual Printix Client to a network

- Identify a computer with a network interface that can route (via VPN) to all the relevant subnets (VLANs) with printers.
- Open Computer properties.
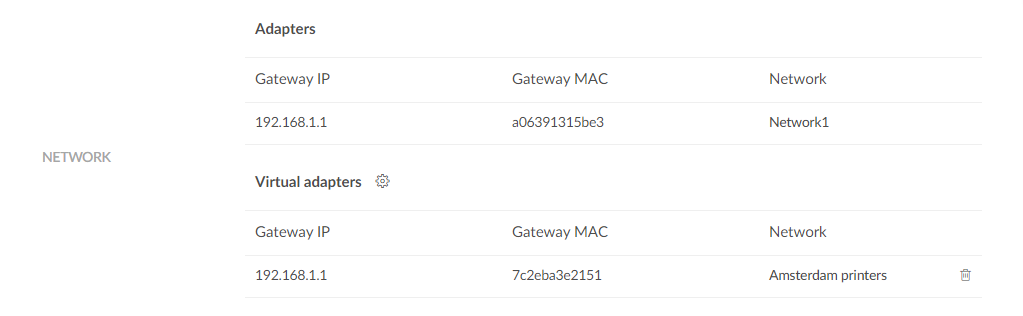
- In the Network section select Virtual adapters setup
![]() to open the Virtual network access menu.
to open the Virtual network access menu. - Select Create new network.

- Enter Network name (Example: Amsterdam printers).
- Enter default Gateway IP (Example: 192.168.1.1) for the printer network. You can obtain that from any of the printers on the network:
- Open the printer’s web page and Sign in as Administrator. Look for Network information where you will find the Gateway IP.
- At the printer use the touchscreen control panel. Look for Network information where you may find the Gateway IP.
- Most printers allows you to Print network configuration. Please refer to the printer’s documentation.
- Select Save.
How to add an additional virtual Printix Client to a network
To get resilience you can add additional computers in the cloud.
- Open Computer properties.
- In the Network section select Virtual adapters setup
![]() to open the Virtual network access menu.
to open the Virtual network access menu. - Select Add to network and then select the network (Example: Amsterdam printers).
- Select Save.
How to remove a virtual adapter from a computer
- Open Computer properties.
- Identify the virtual adapter gateway (Example: Amsterdam printers).
- Select the Remove
![]() icon.
icon. - Check I accept and select Confirm.
- The gateway remains listed on the Network properties page.
See also:
Allow communication with the printers
These ports must be open to allow communication with the printers:
- SNMP on UDP port 161
Access and collect information from printers via SNMP. Both SNMPv1 and SNMPv3 is supported. ICMP message requests and replies must be allowed on the local network, as the ping command is used to discover printers. - RAW print on TCP port 9100
Transfer print data to the printers. The computer with Printix Client must be able to reach the printer on the network to allow printing. Print data can also be sent via LPR and TCP port 515. Use of other port numbers is also supported. Print data can also be sent via:
See also:
Post your comment on this topic.